Instructions:
Step 1:
- After downloading the app, open the GotTicketing App. Hit OK
Step 2:
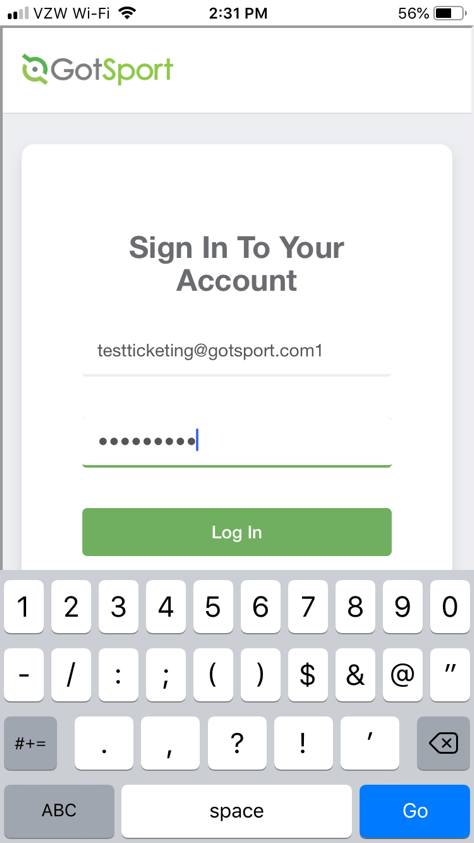
- Enter your credentials (same email/userID for GotSport).
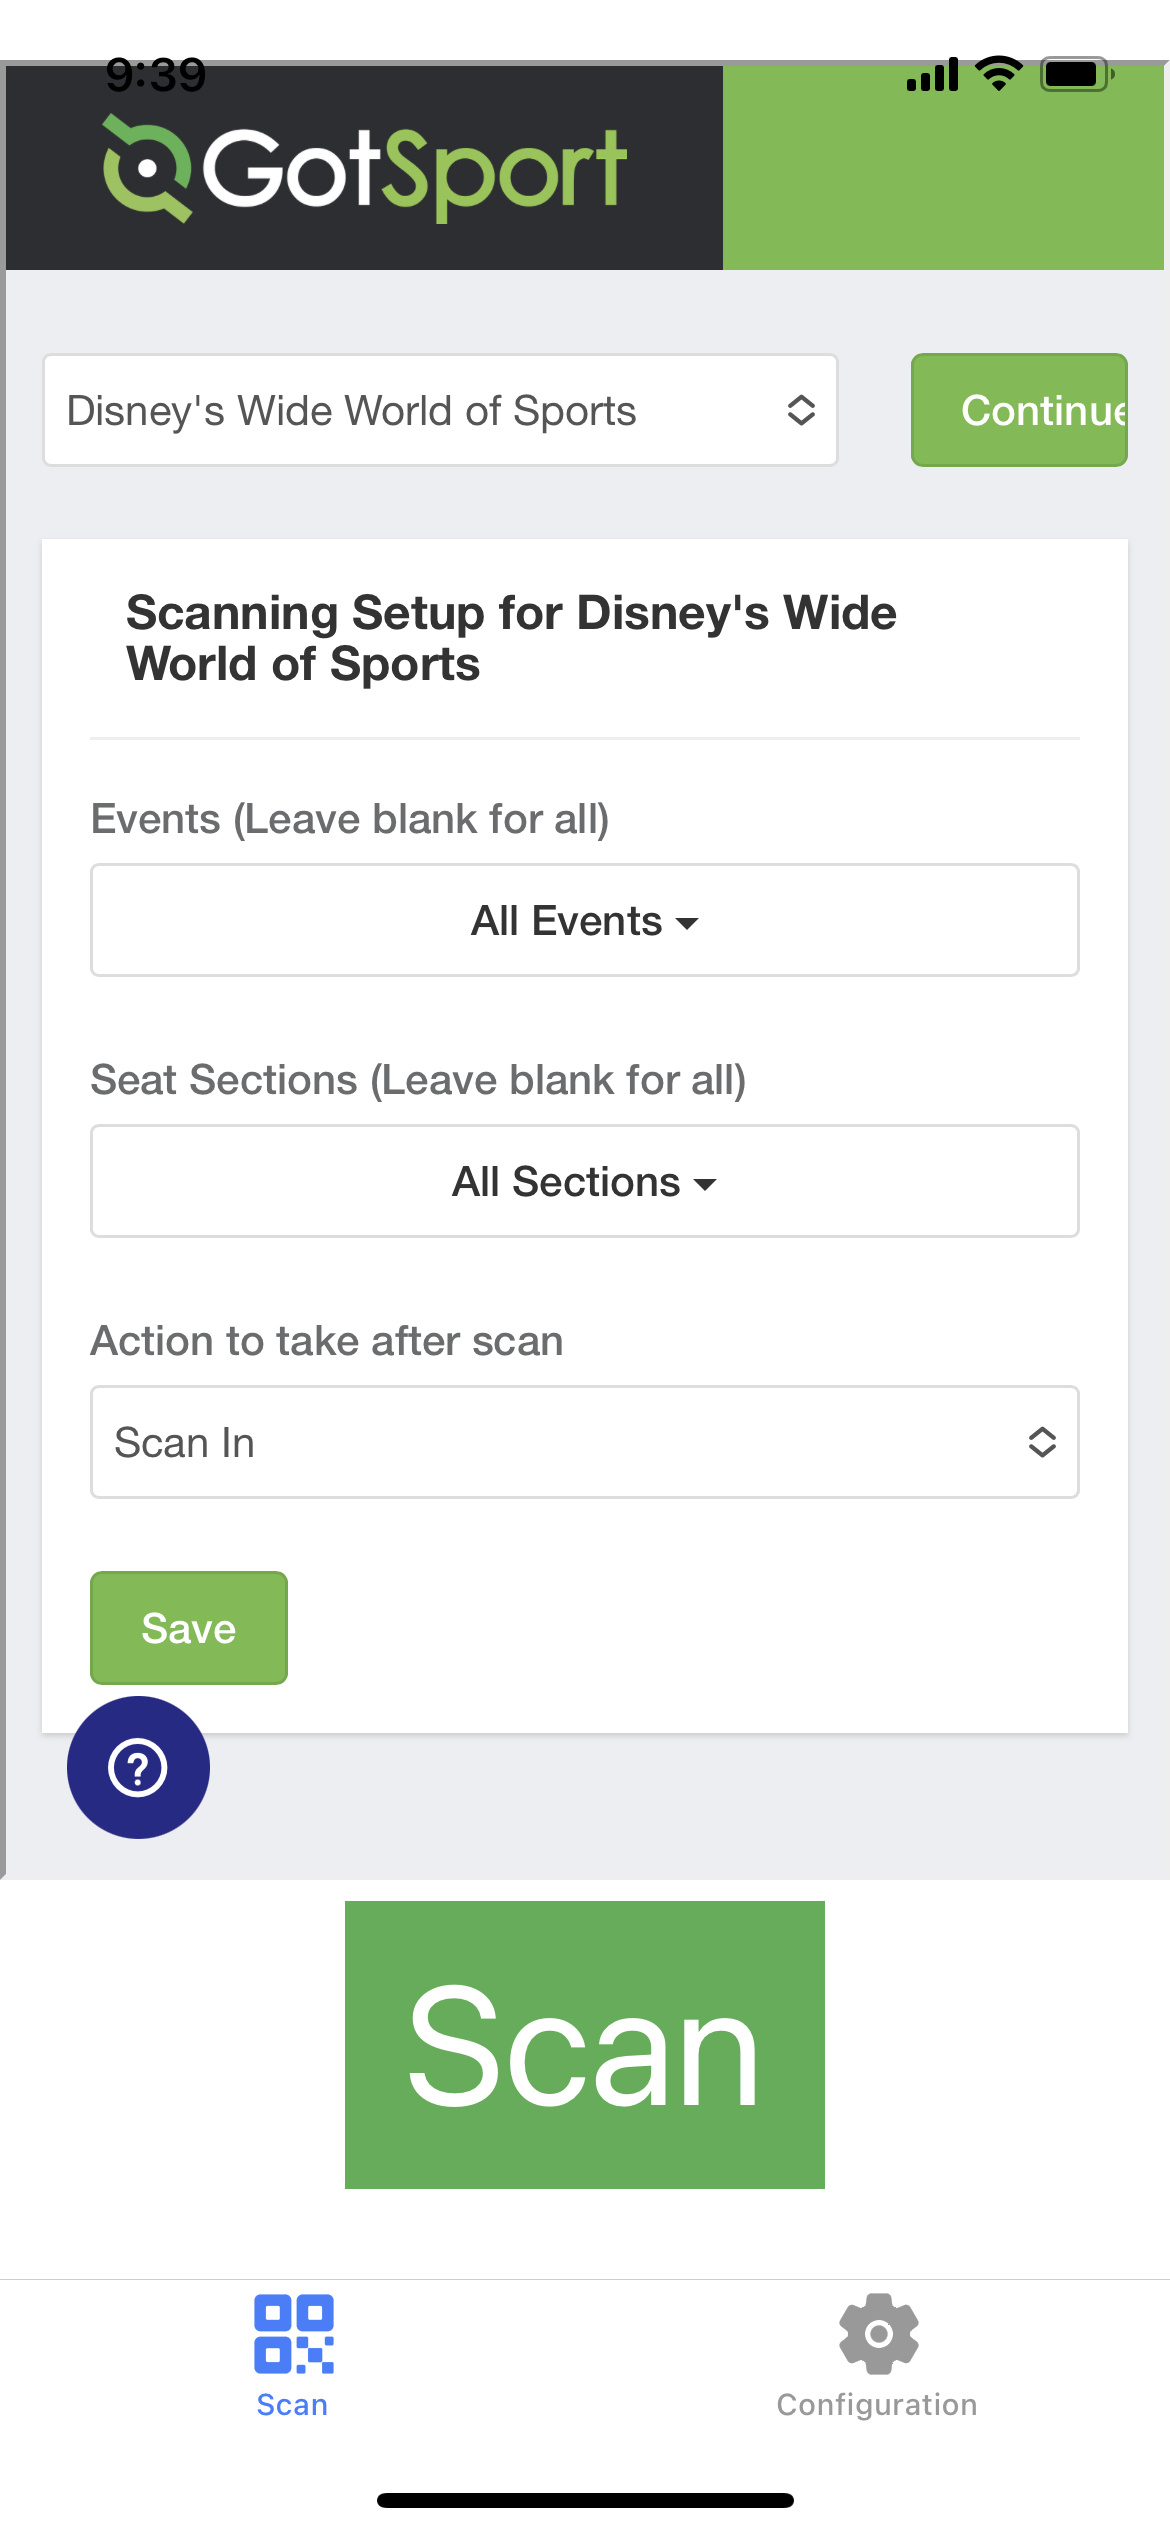
Step 3:
The app will automatically default to your organization. From the drop-downs, select the event(s), section(s), and action to take after the ticket is scanned. Hit Save.
- Leaving Events and Seat Sections blank will select all events and all sections.
Step 4:
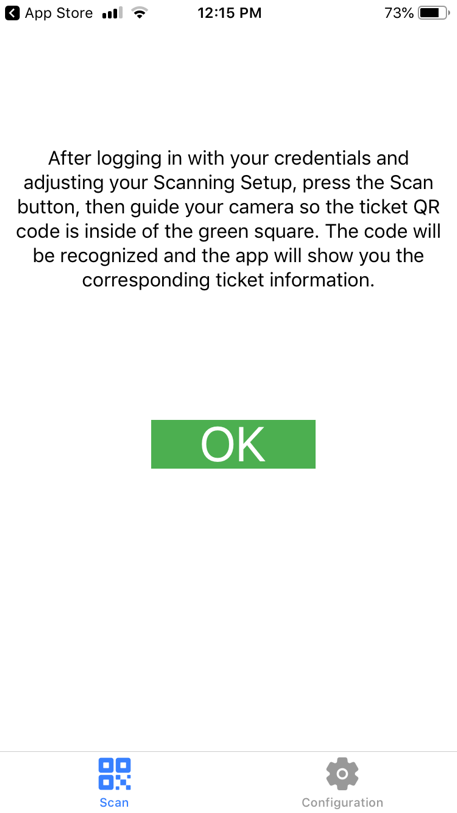
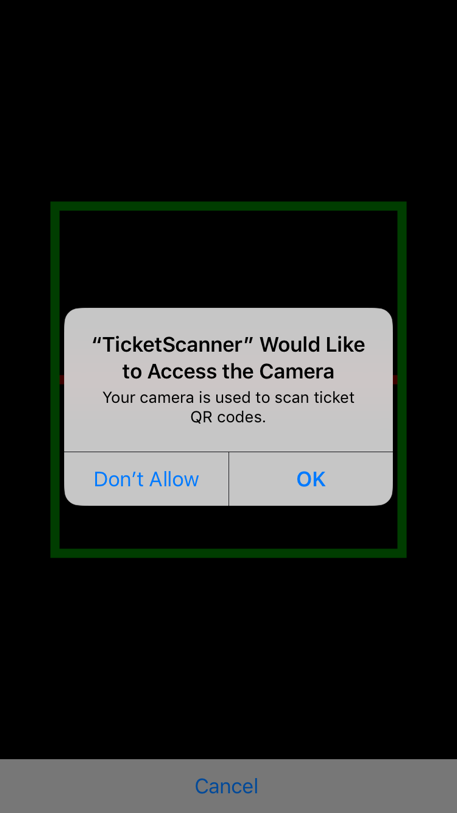
- Select the scan button to scan the tickets. This will then request the app to have access to the camera. Select Ok. Begin scanning tickets accordingly.
Step 5:
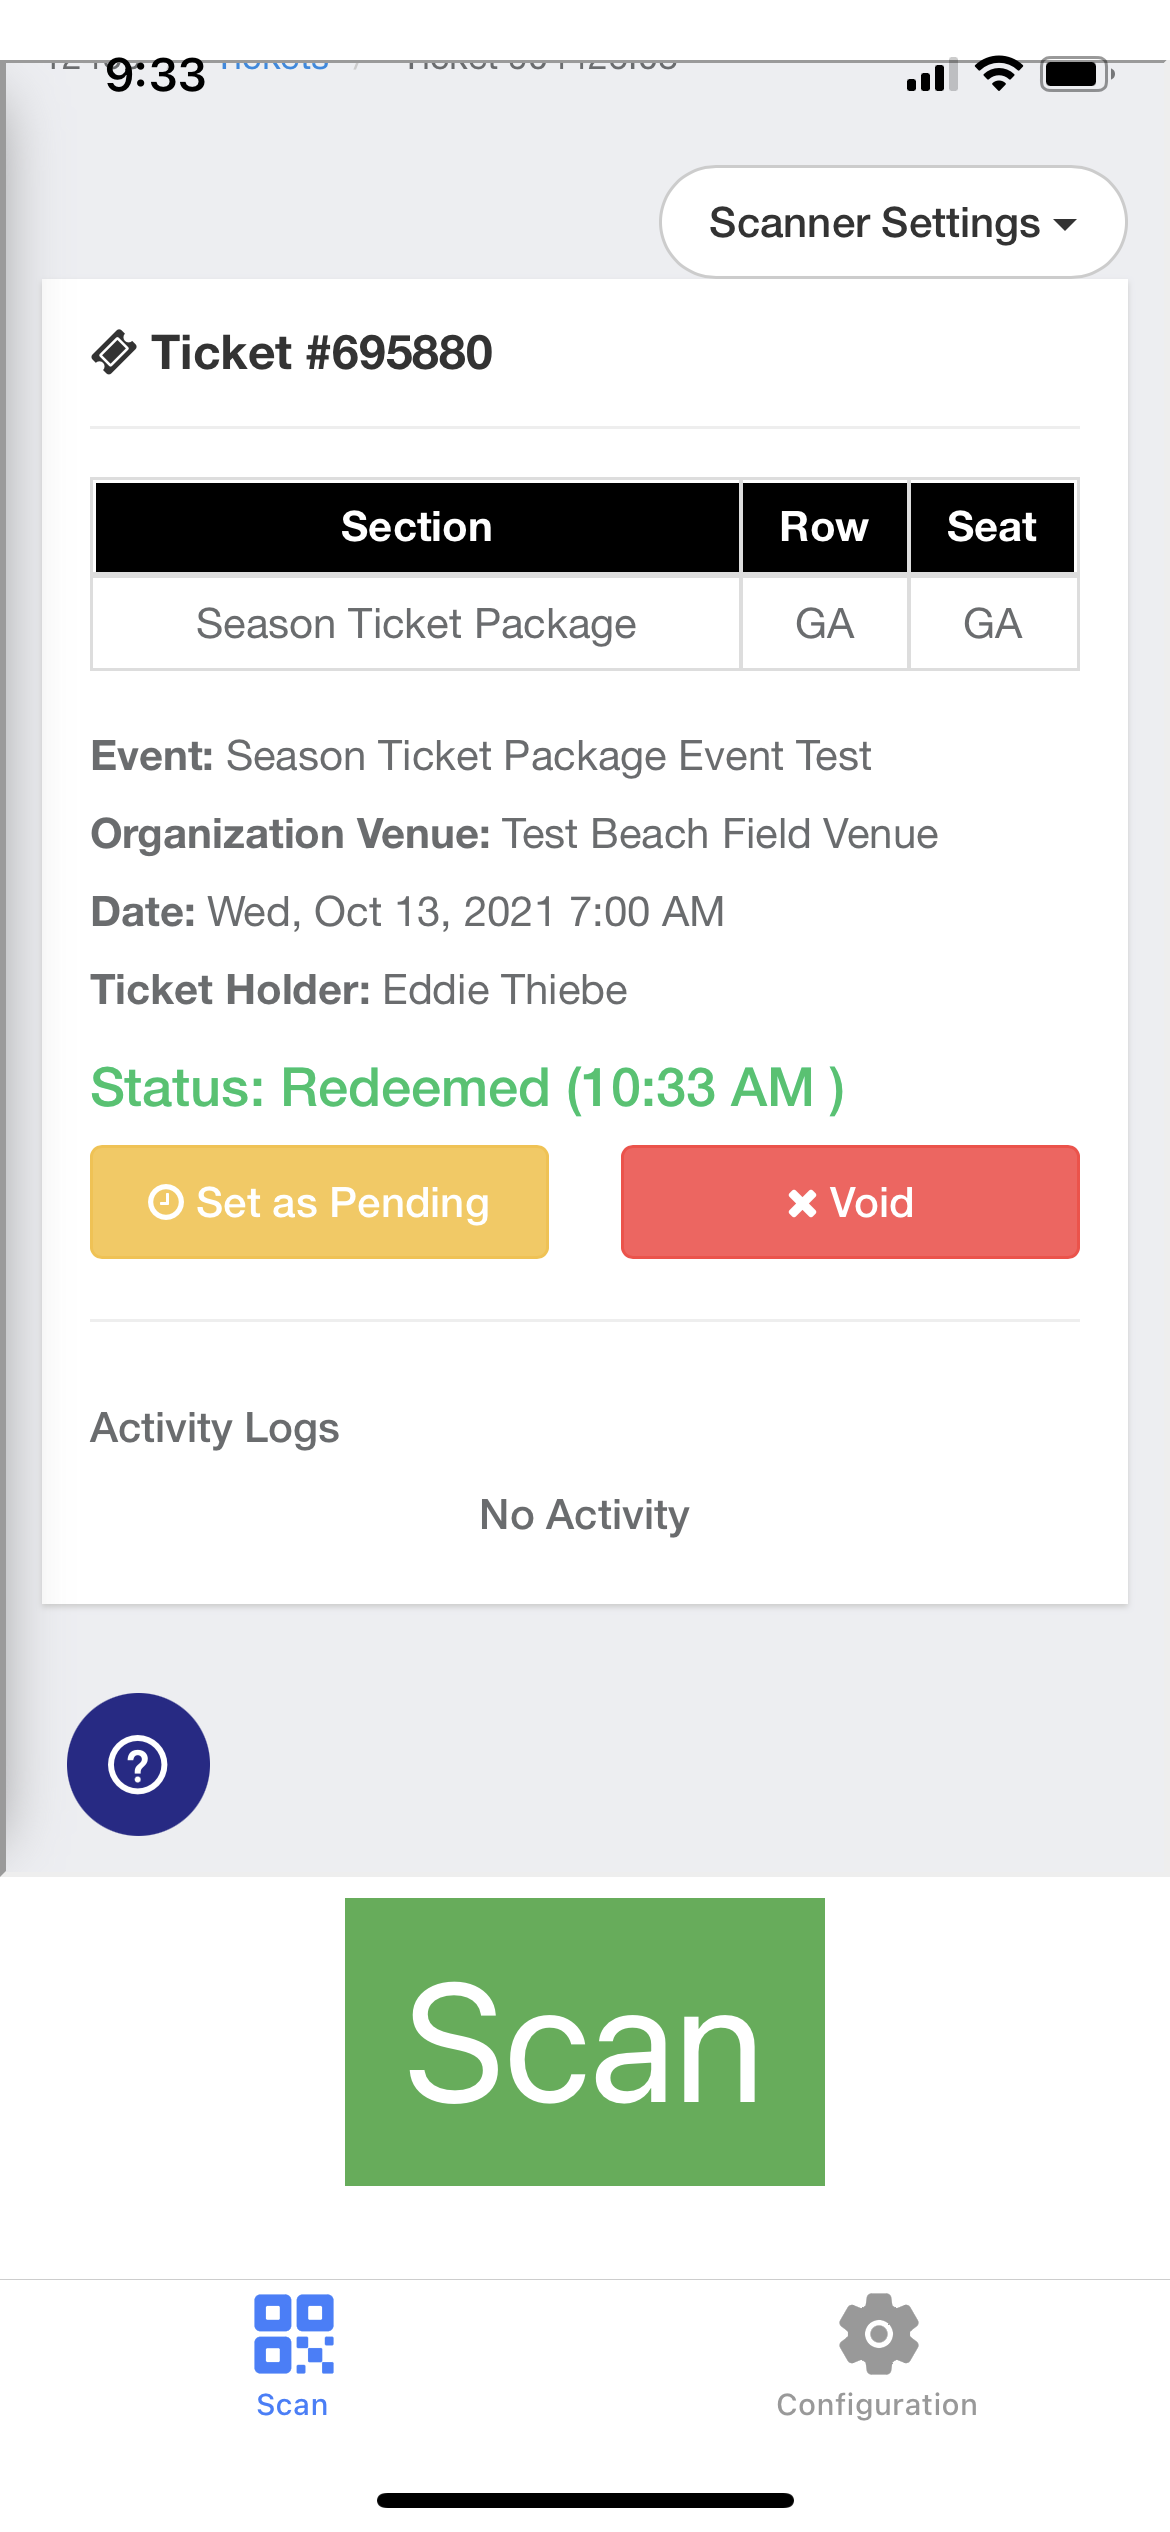
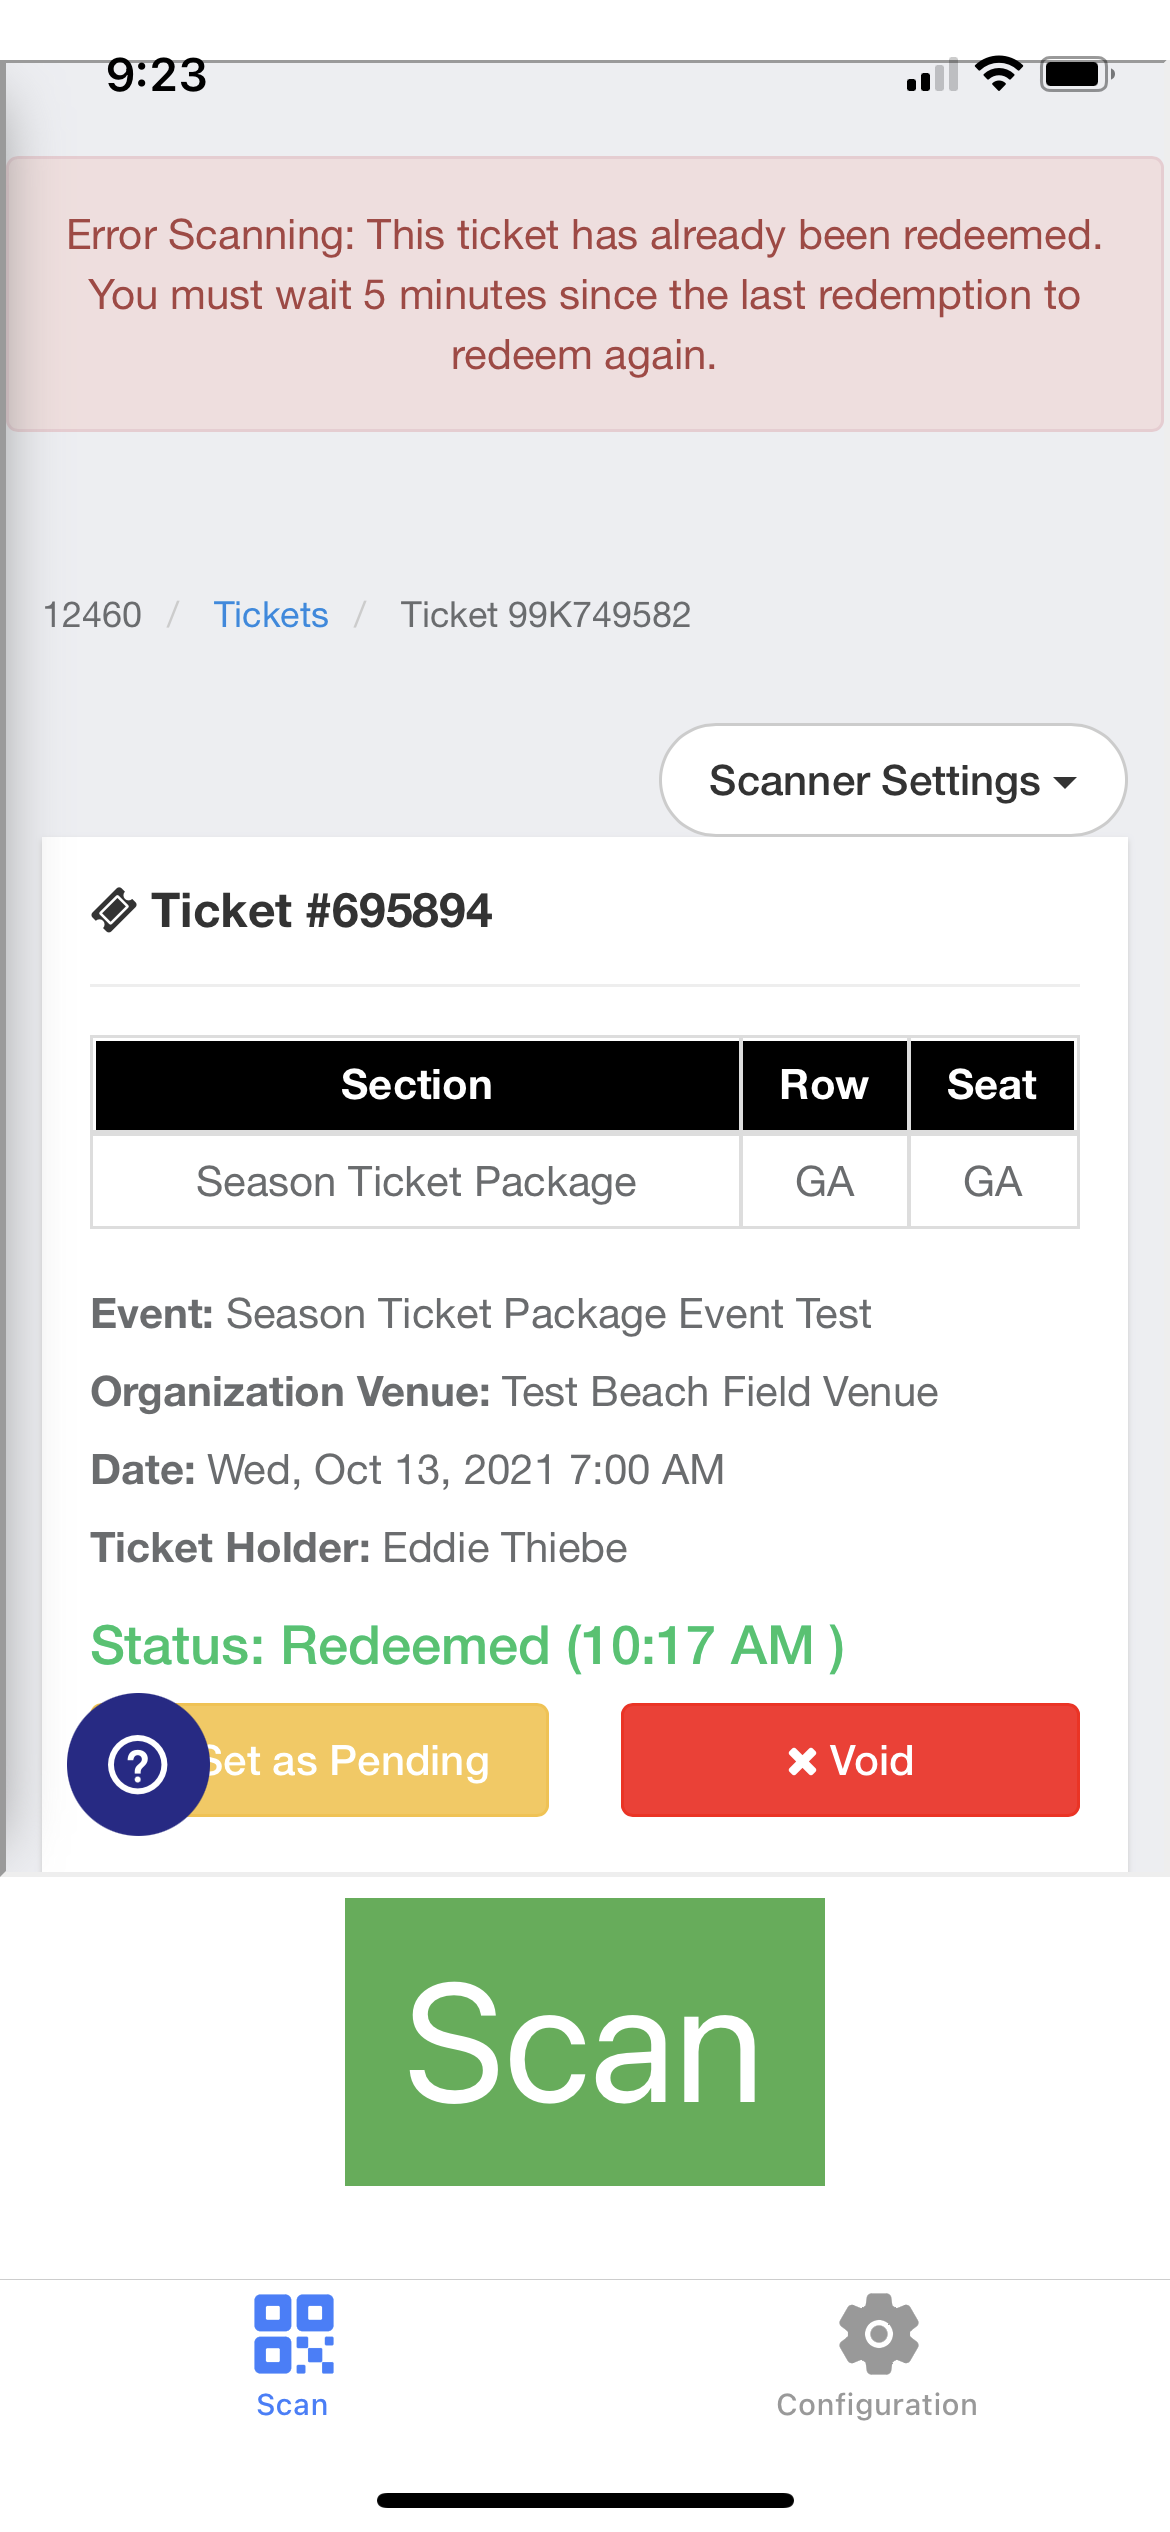
Place the scanner over the ticketing QR Code to scan the ticket. If the ticket scan is successful, the green bar labeled "Ticket Successfully Scanned" will populate at the top of the scanning app along with the ticket information.
- Ticket Number
- Section
- Row
- Seat
- Event Name
- Organization Venue
- Date
- Ticket Holder
- Status of the Ticket
 Step 6:
- If the ticket scan is unsuccessful, a red bar will identify the scanning error along with the ticket information.
Step 7:
- The ticket activity log populates at the bottom of the ticket after a successful scan or unsuccessful scan.