Instructions
Step 1:
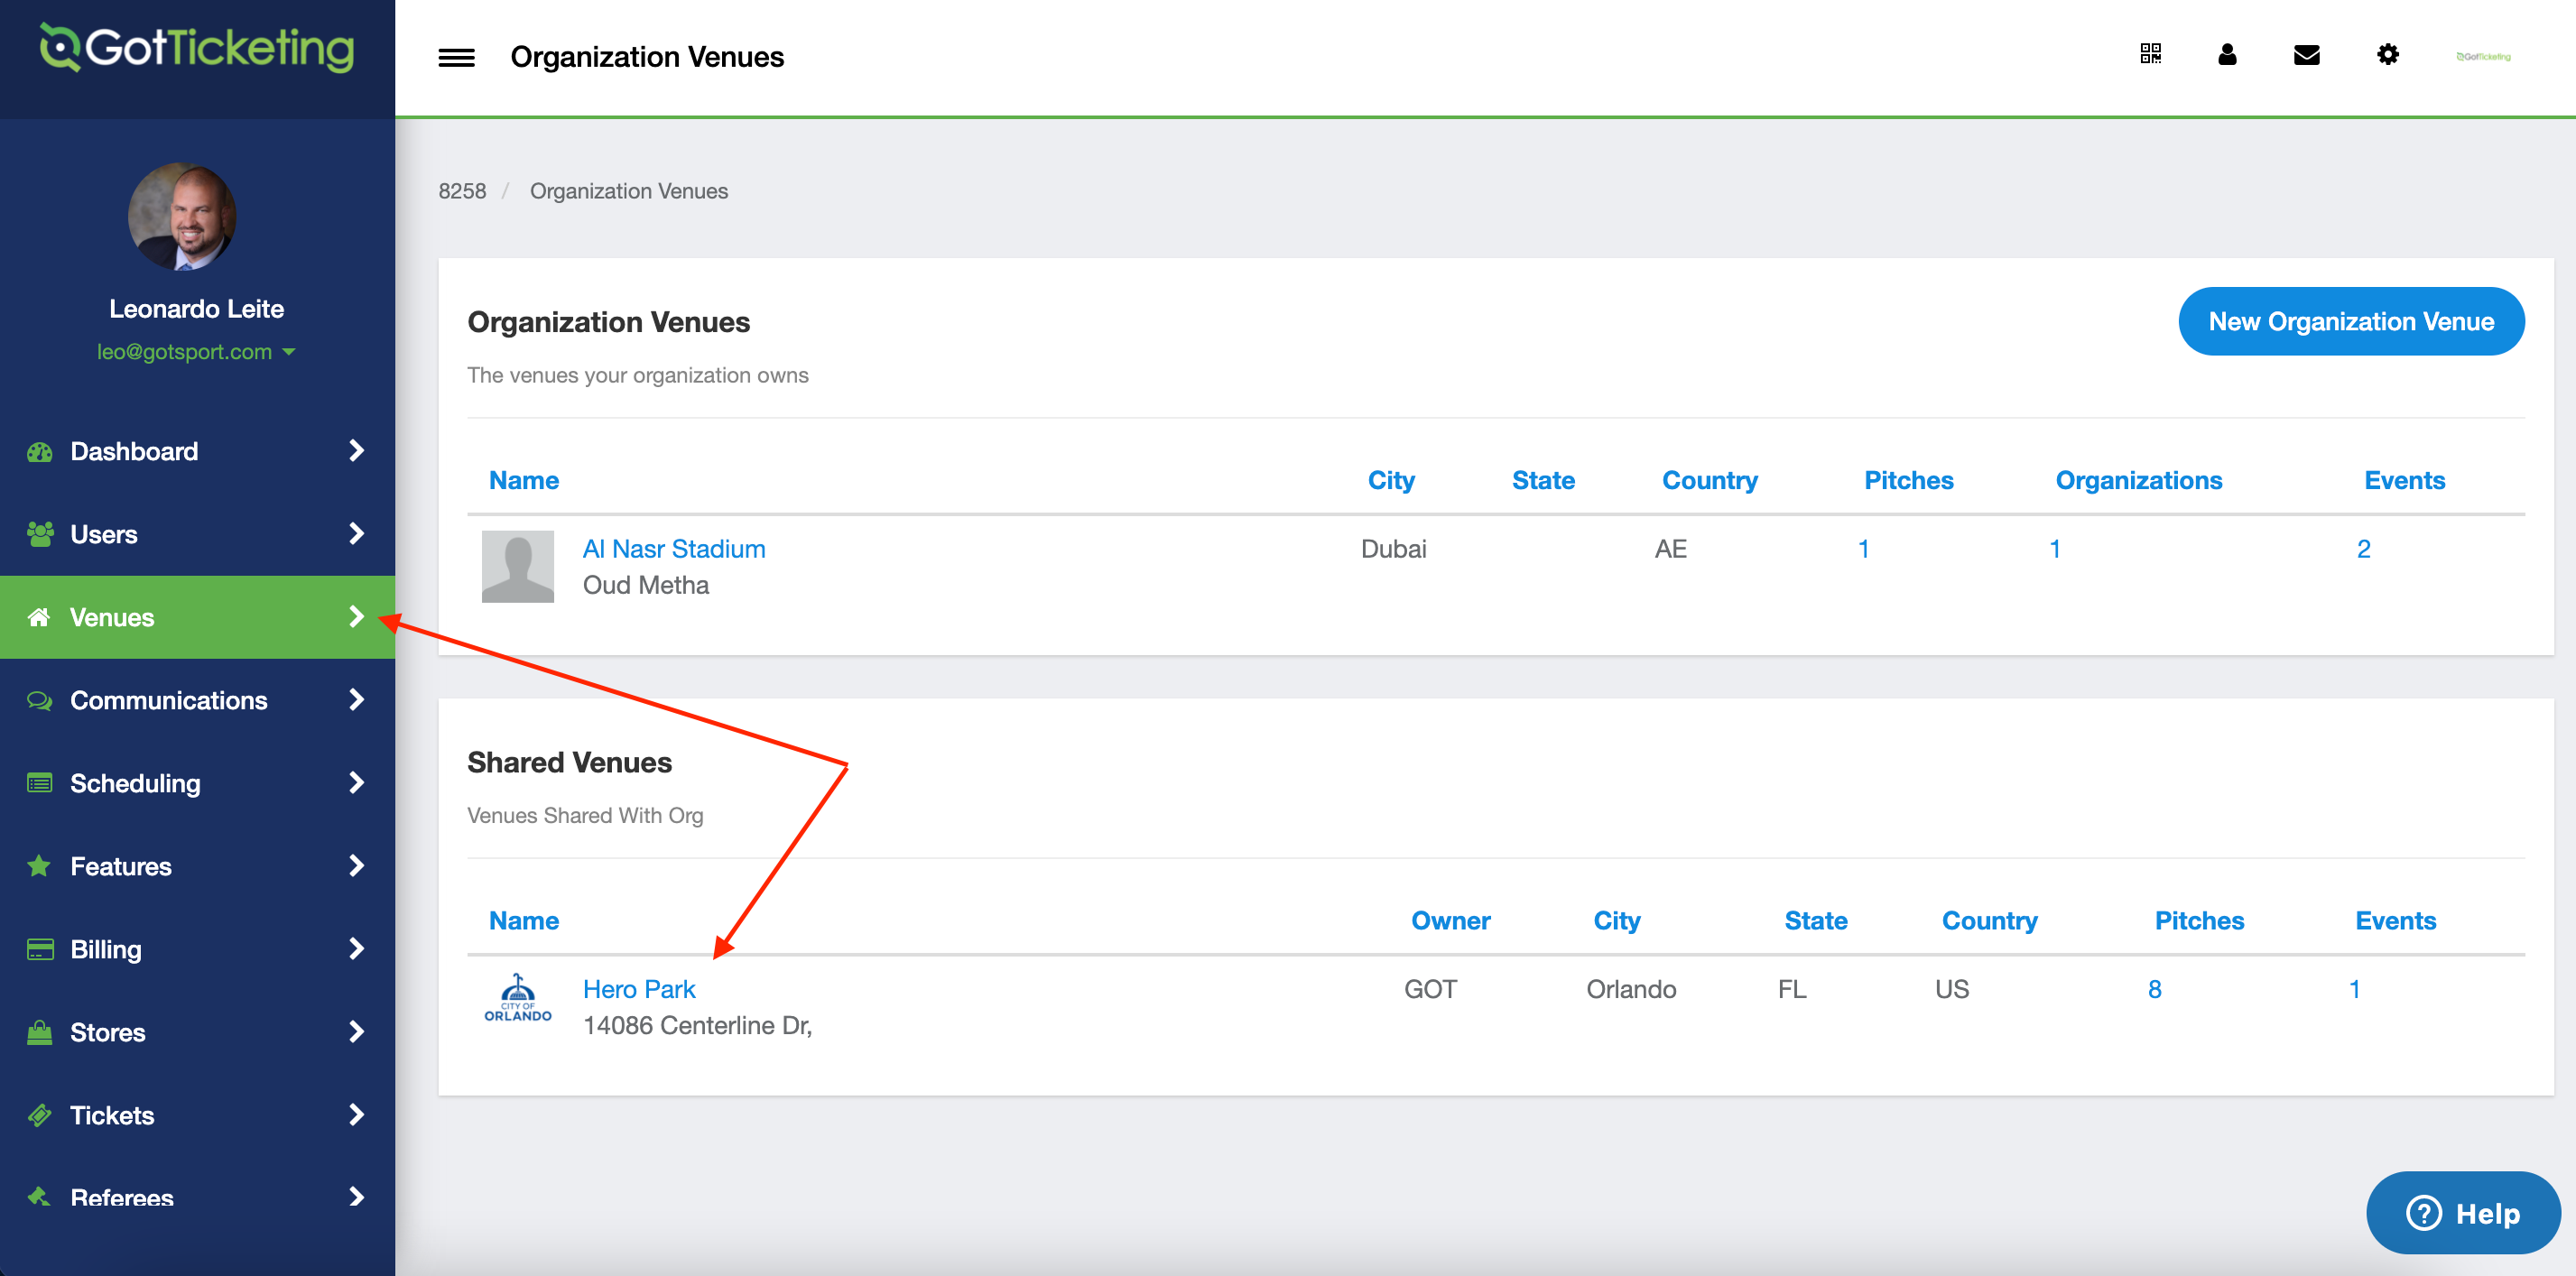
- Select venue on the left toolbar and select the venue where you want to create a ticketed event
Step 2:
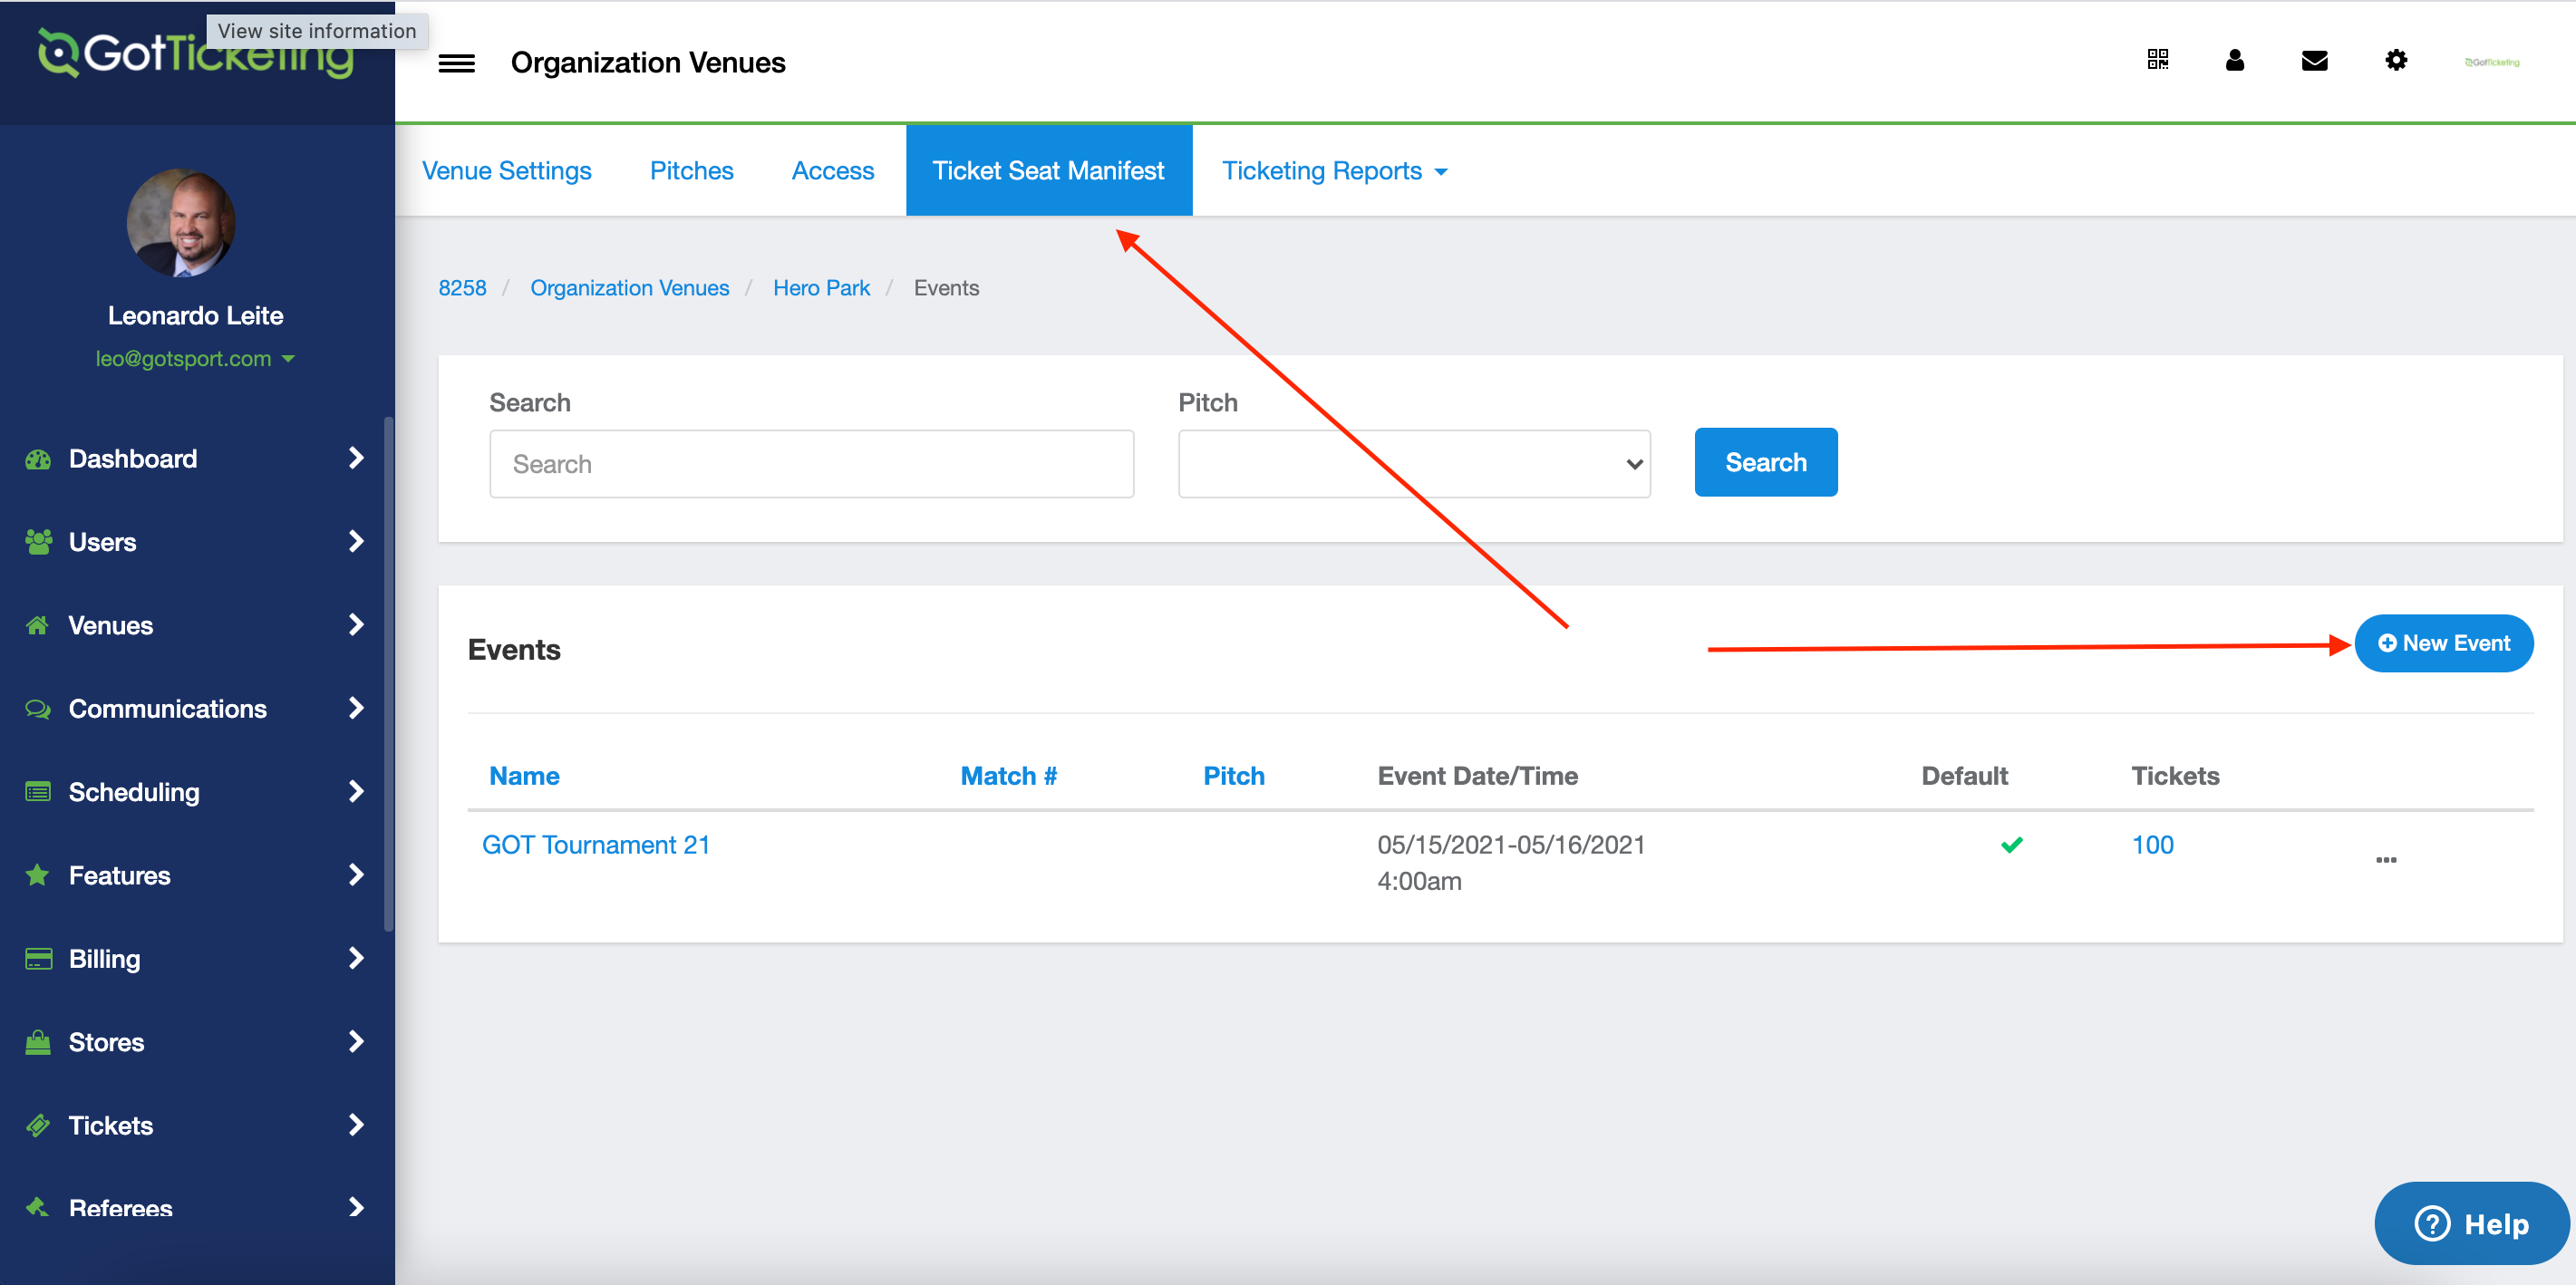
- Then, on the top bar, click on ticket manifest and click on a new event.
Step 3:
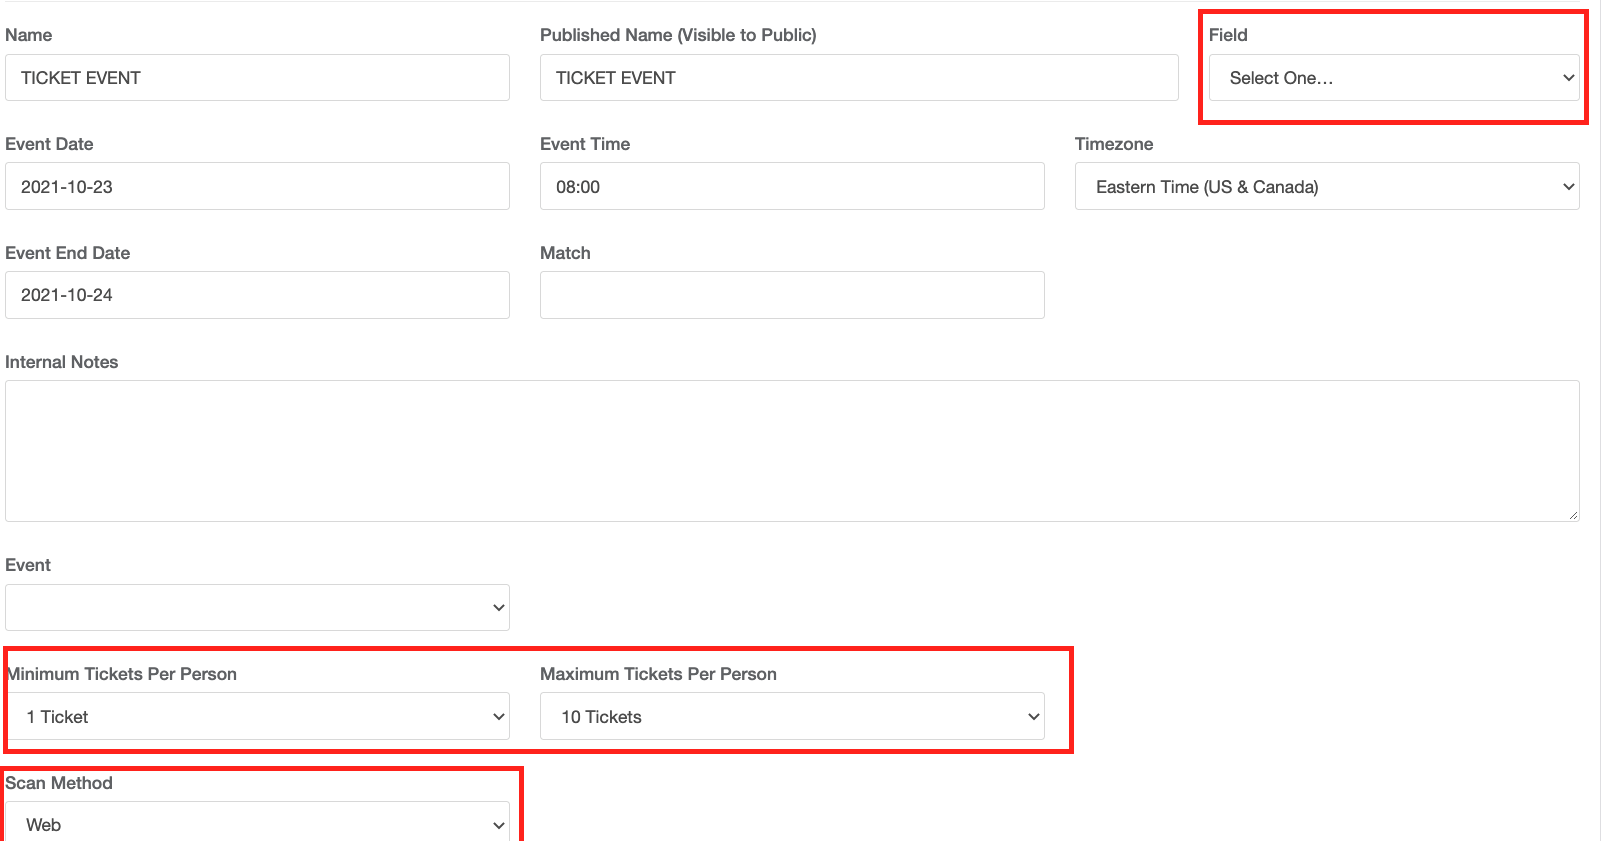
Functions to consider when creating a new event.
Pitch: use this function If the ticket you selling is for a specific pitch on the venue
Timezone: Please make sure you set up the proper timezone so your tickets are active at the appropriate time
Minimum & Maximum ticket per person: you can choose the Min and max amount of tickets per user account purchased.
Scan methods: you can select Web (box office scanner device) or Mobile app ( using a cell phone with a got ticket scan app)
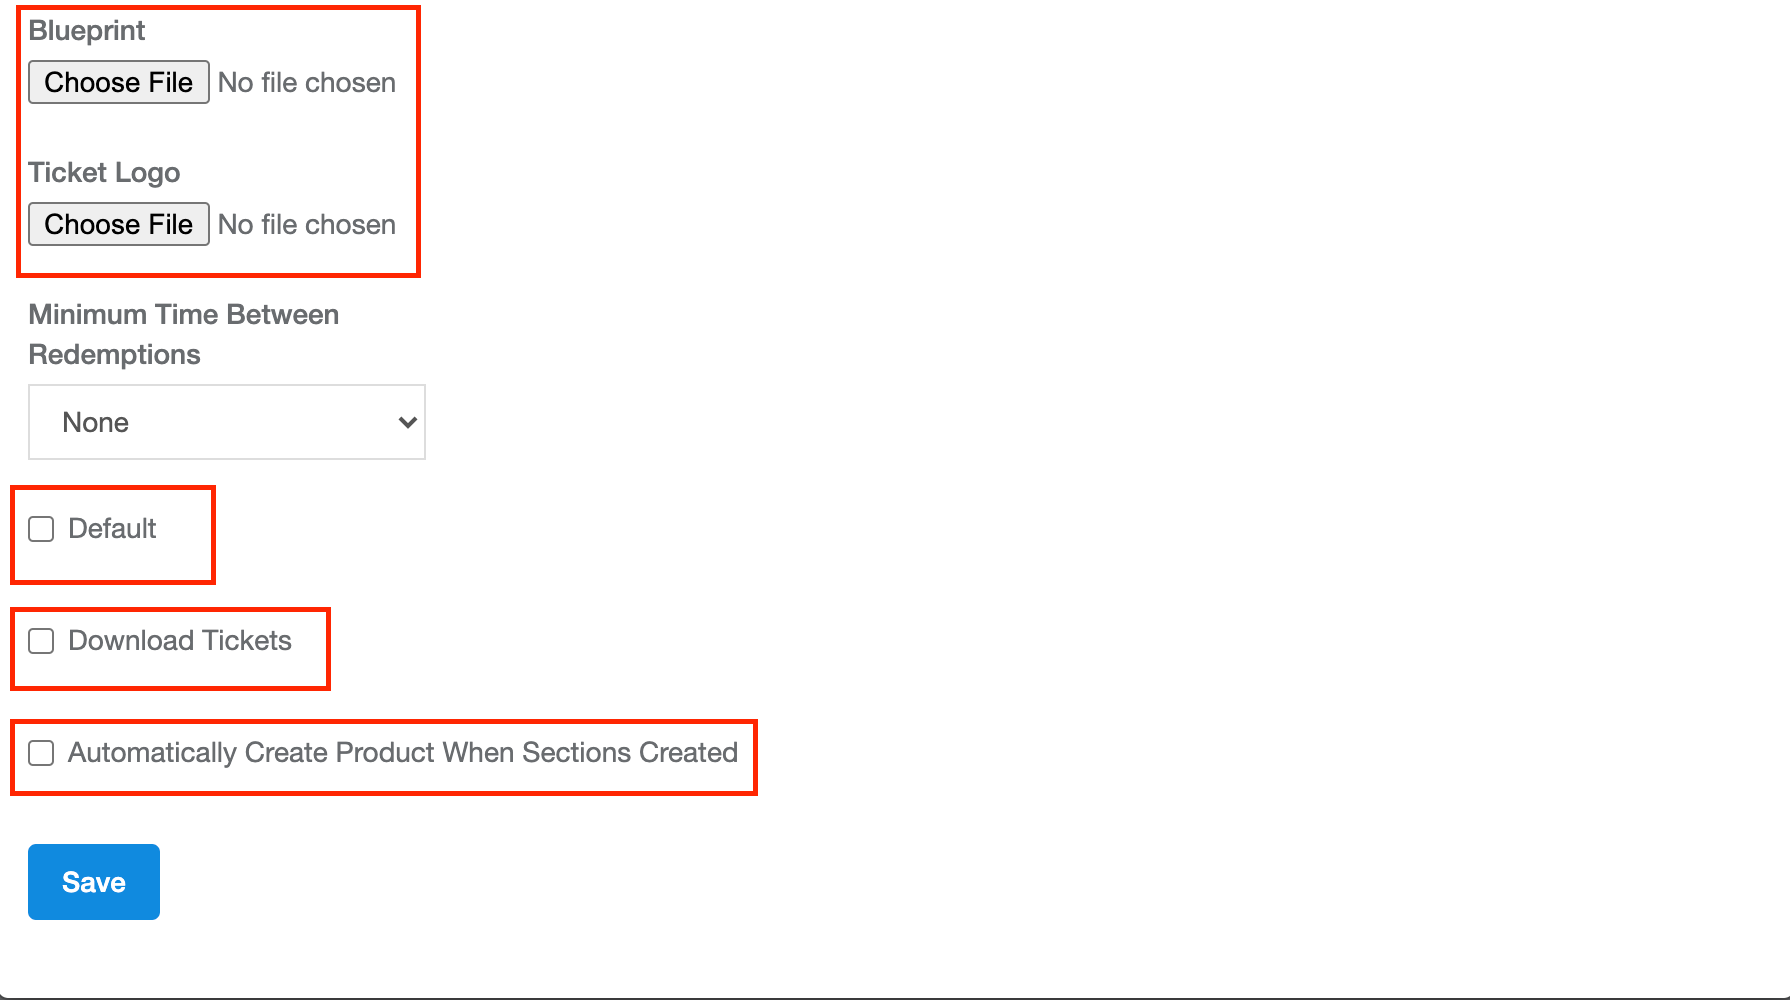
Blueprint: Uploading your blueprint will be used for creating sessions and displaying what locations the tickets will be valid
Ticket logo: Will display this logo on the ticket
Default: If selected you will be able to clone this event
Download tickets:you can select Web (to use smart device or scanner camera) or Mobile app (using our GotTicketing scanning app with a smart device)
Automatically create a product when sessions are created:This feature is for unique type events. Ask GotTicketing rep for guidance if this is required or not for your event.
Minimum Time Between Redemptions: The amount of time between a ticket being redeemed before it can be redeemed again. “None” means there is no window of time between redemptions – unlimited.
Step 4:
- Once you click save, you will get the checklist of steps to complete your ticket event.

Step 5: Creating Sections for a General Admission event
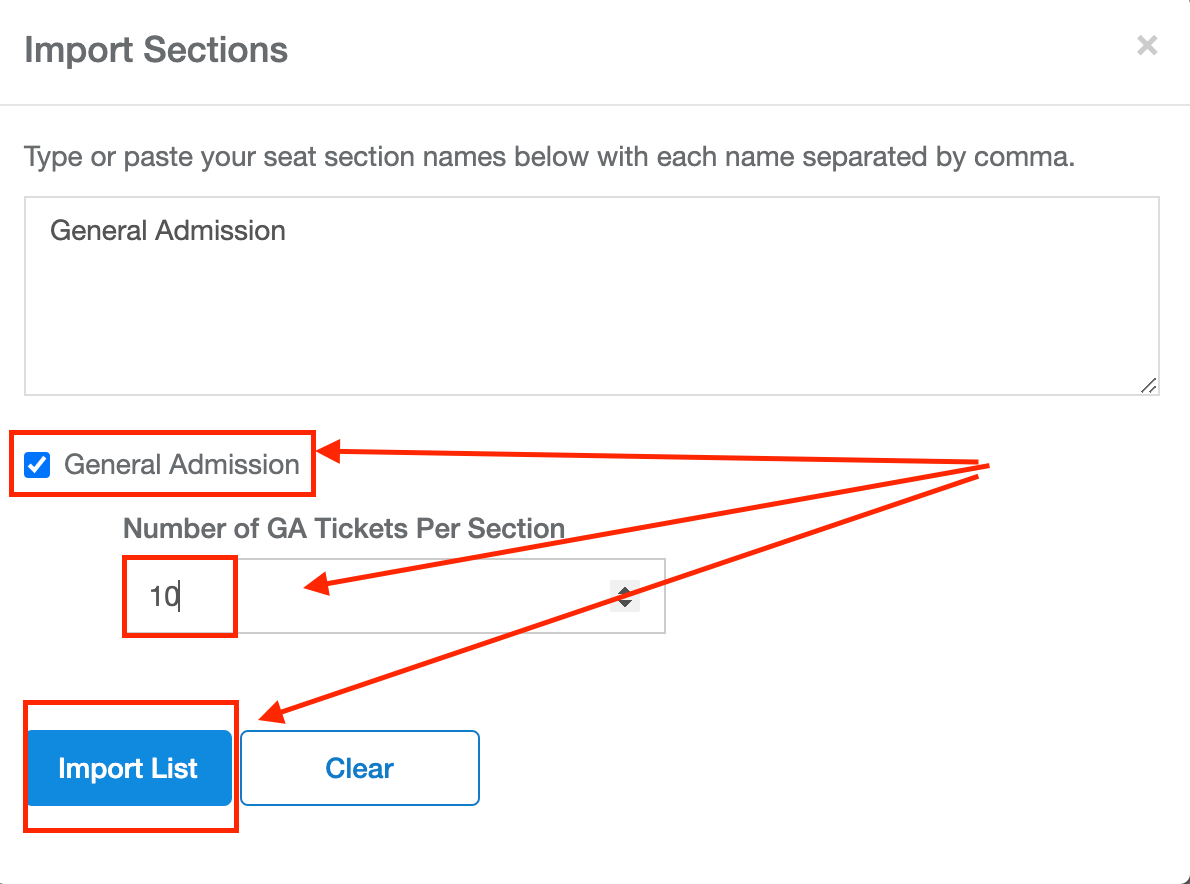
- Click on the section tab, then click on "import Text."
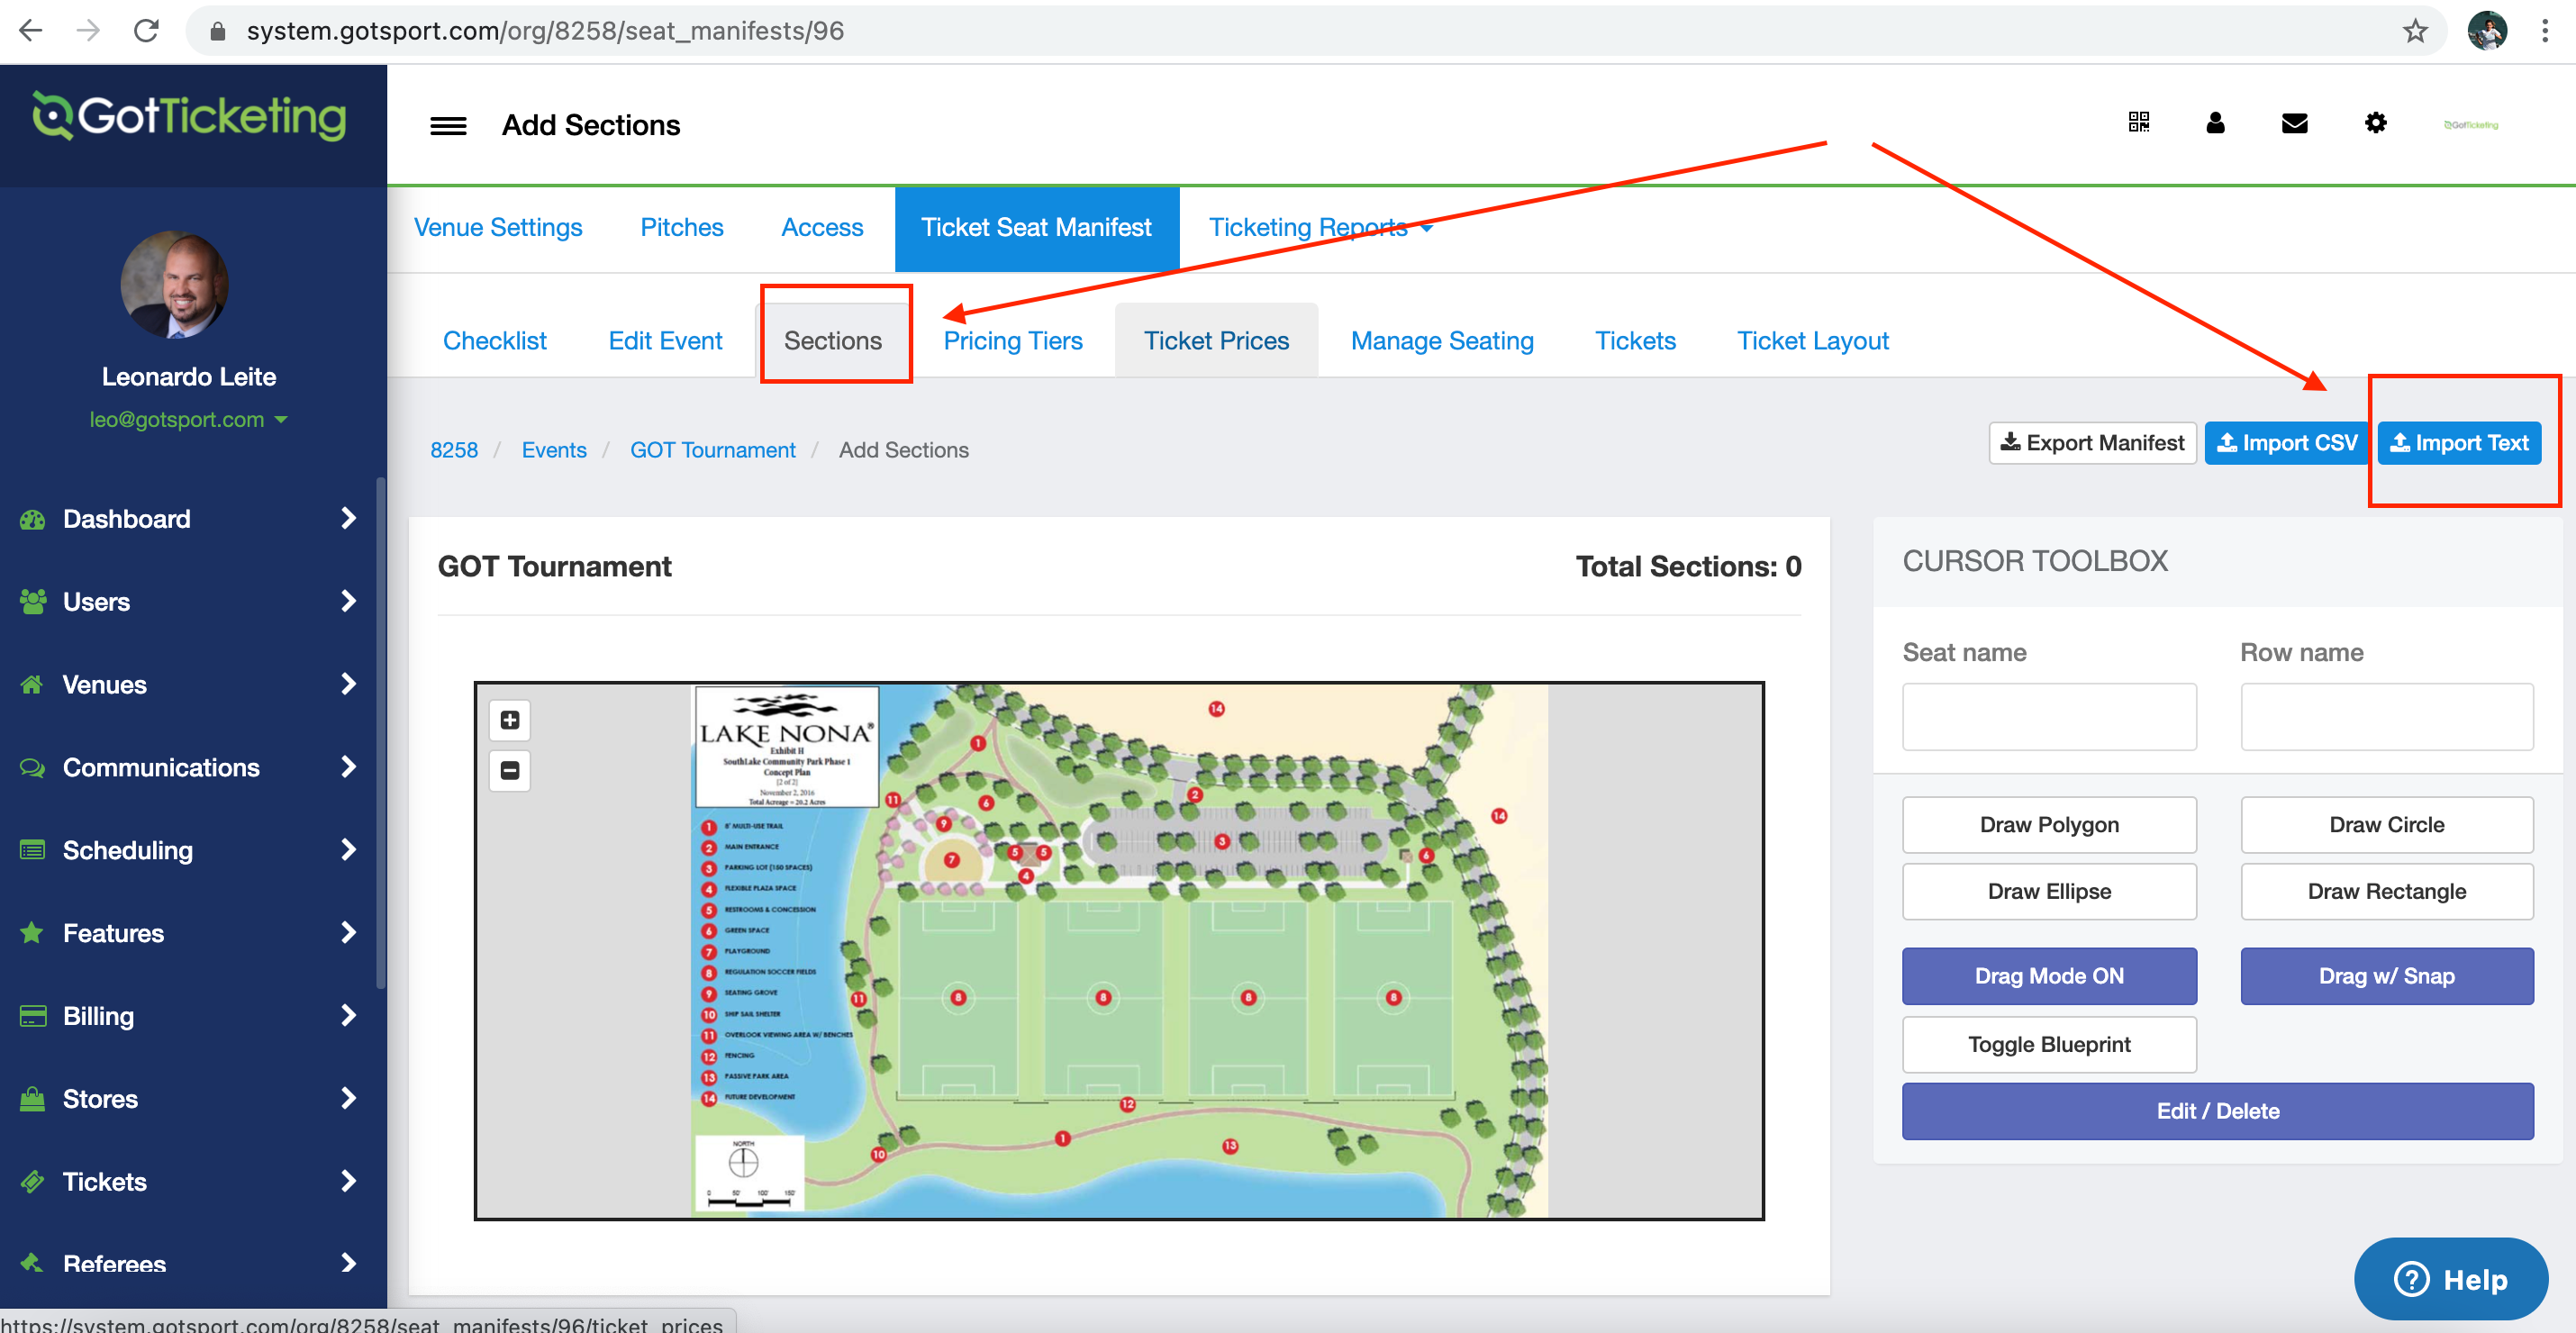
Step 6:
- Select the Section that you are interested in create. ( For this example, we will create a General Admission section).
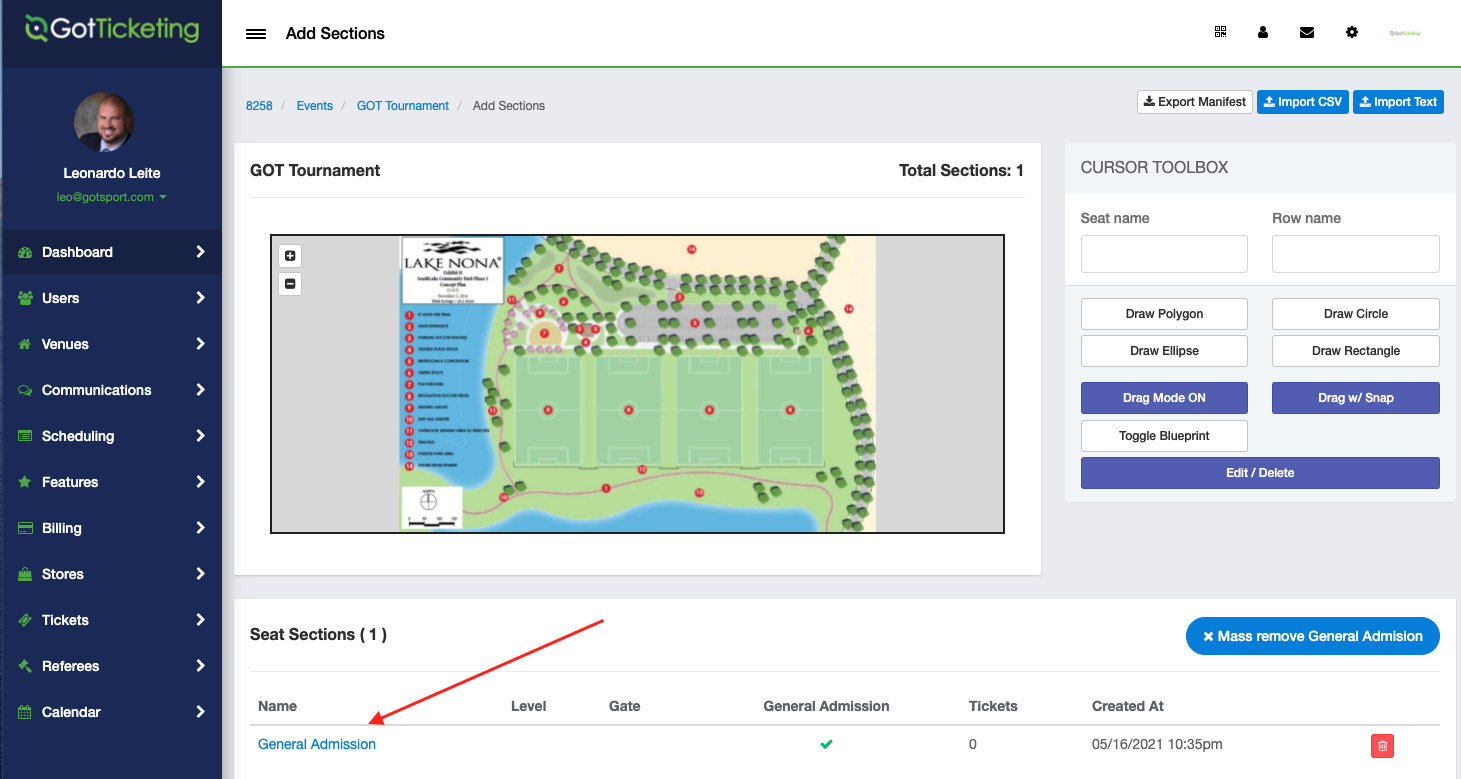
Step 7:
- If you need to edit, you can click on the desired Section.
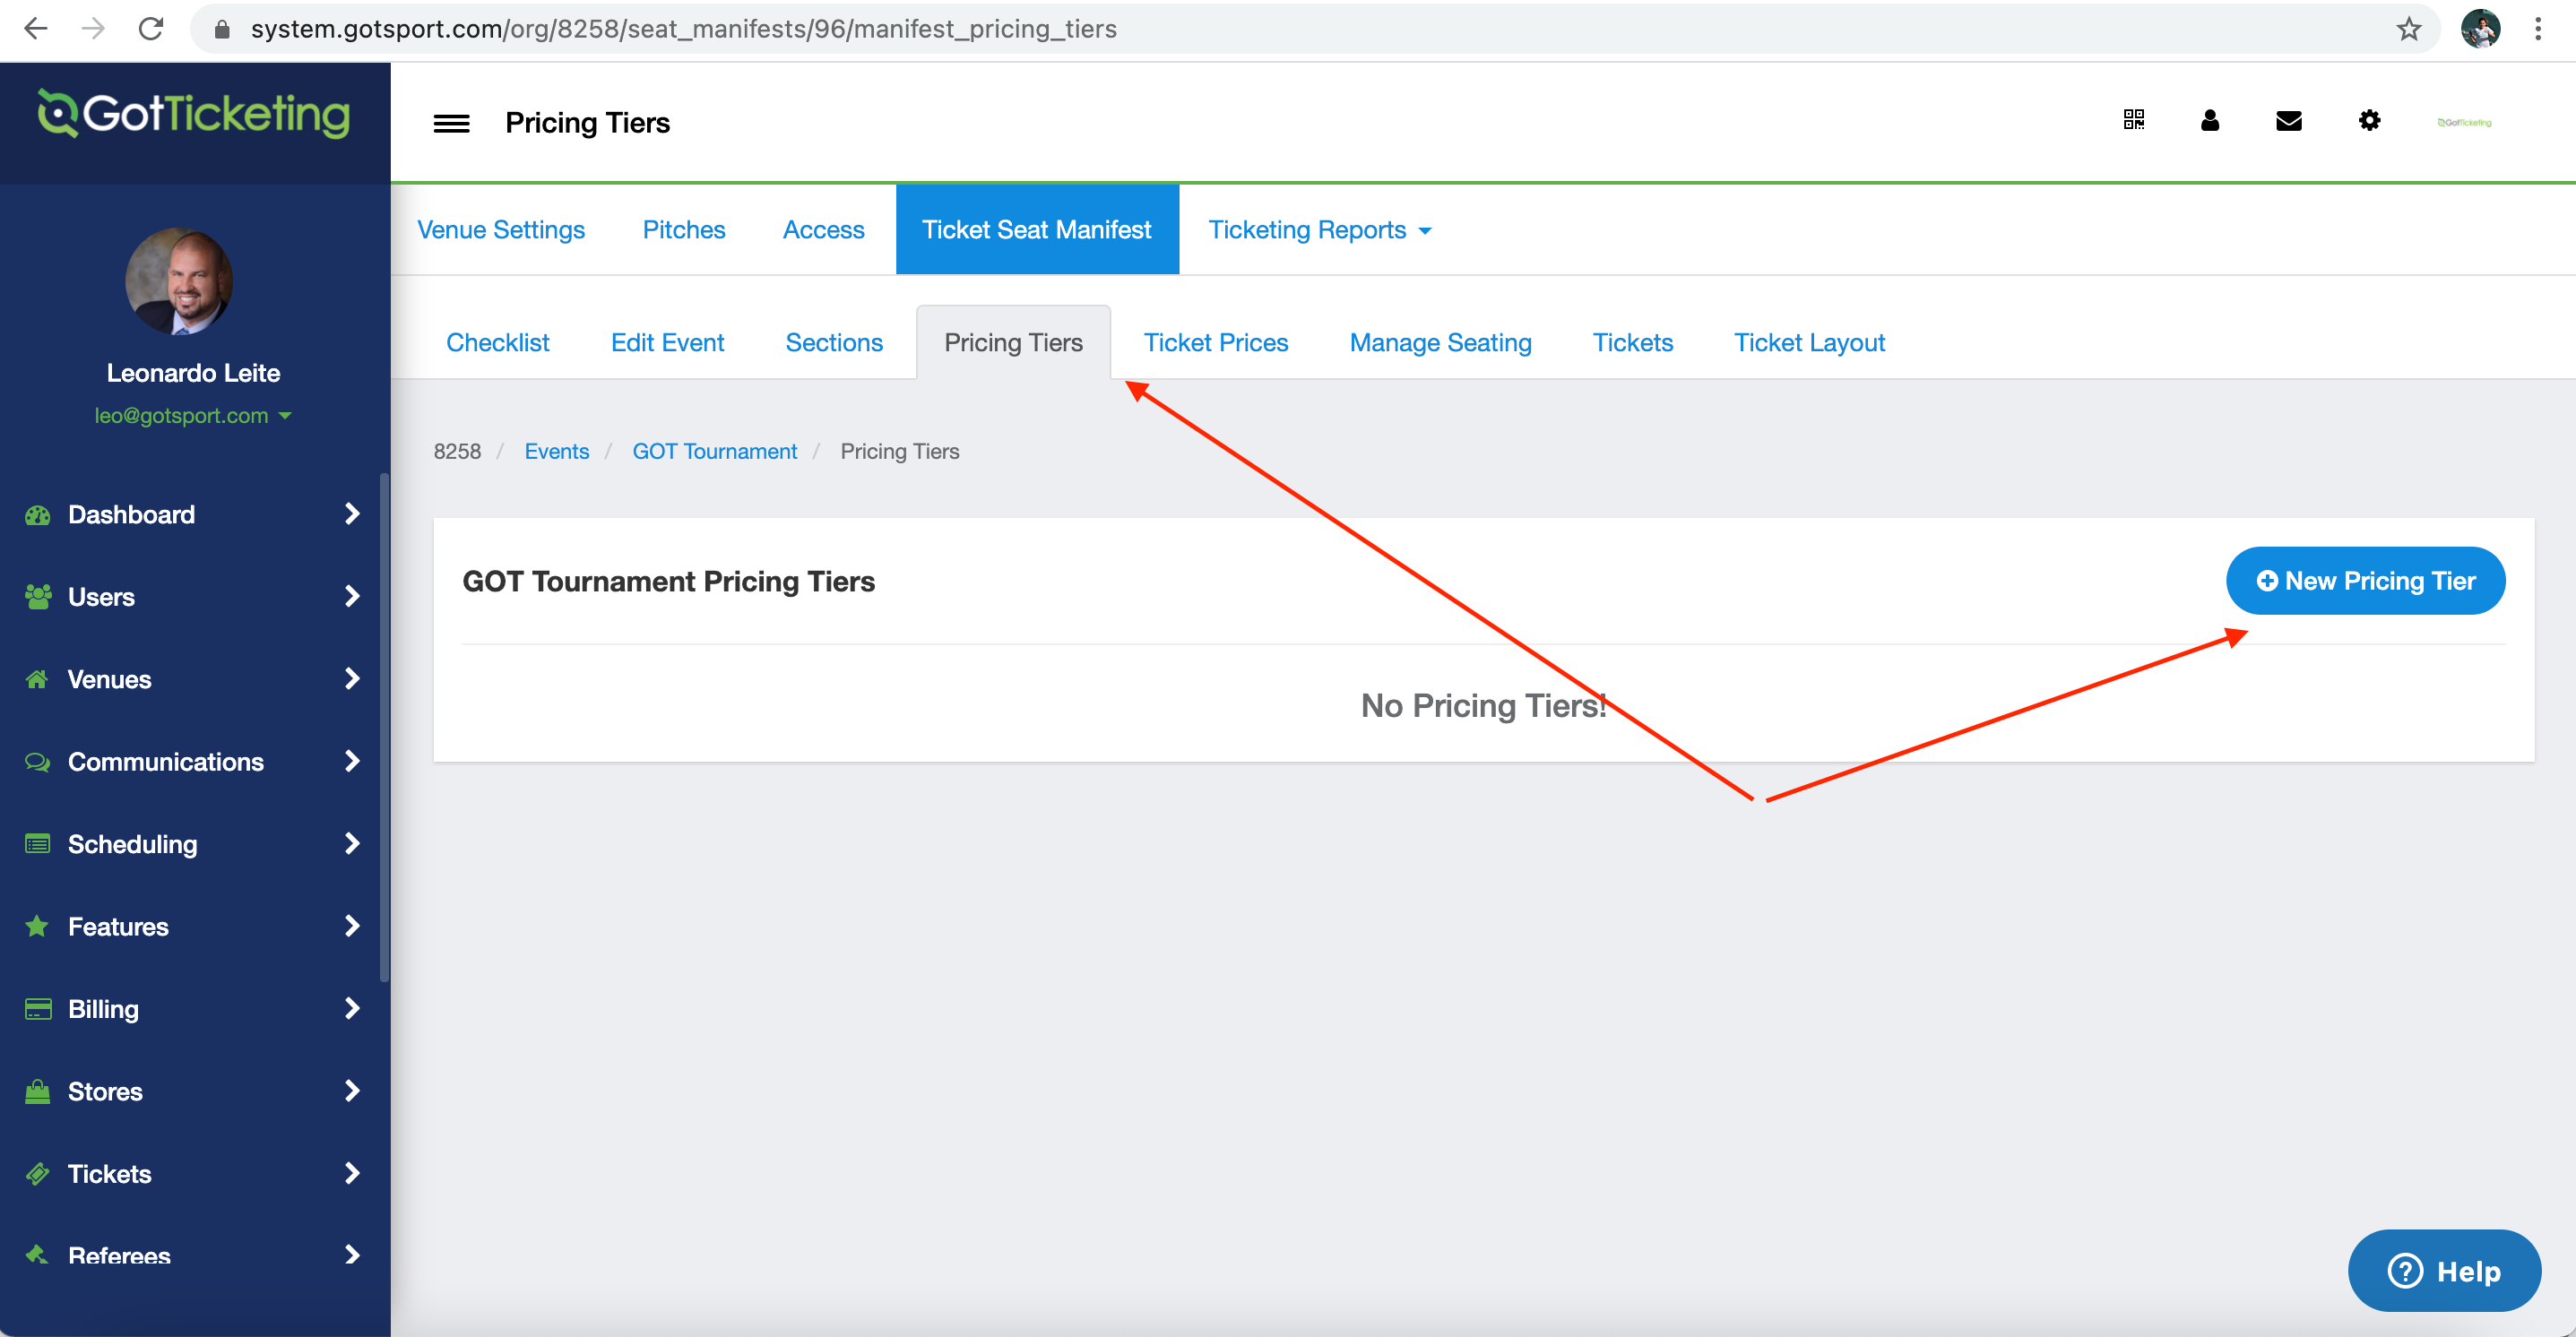
Step 8: Creating Price Tier
- Click on the "Pricing Tiers" tab, then click on "New Pricing Tier."
Step 9:
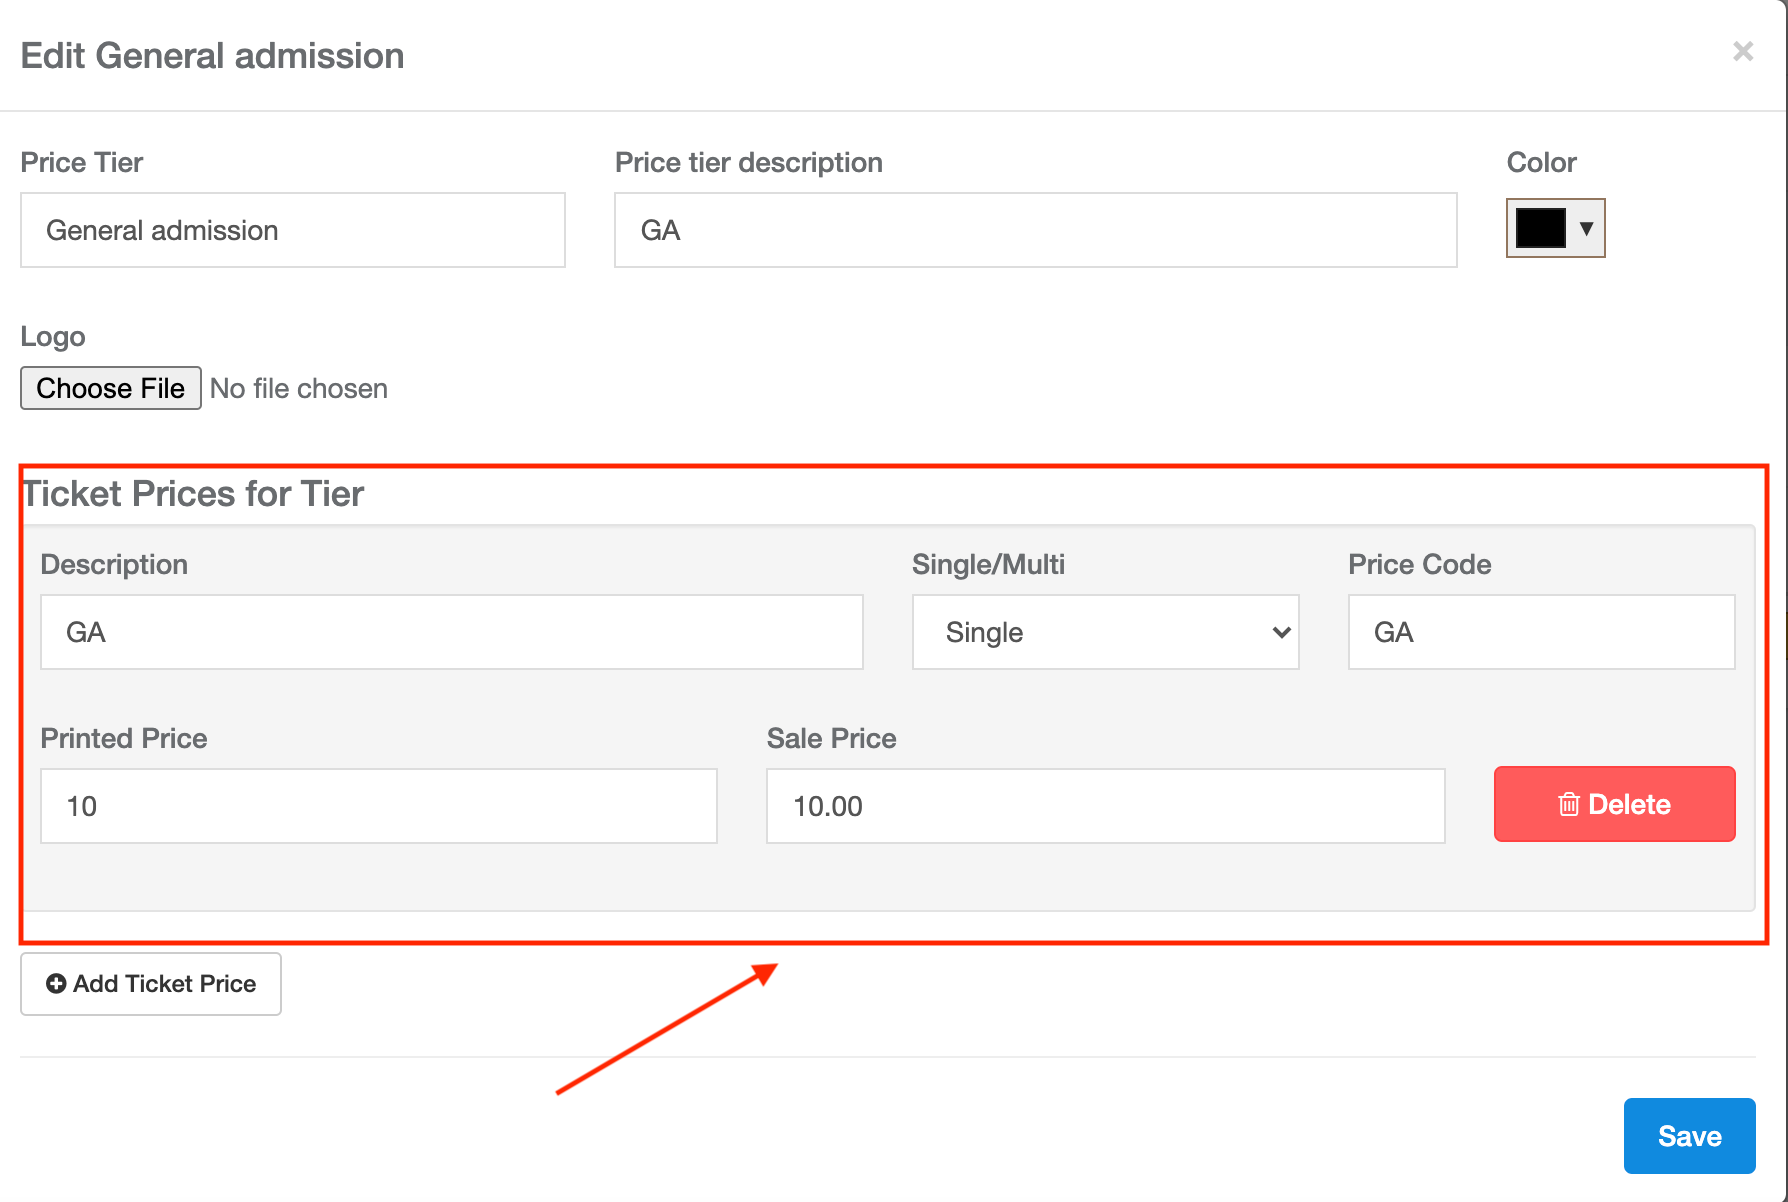
- Fill in the information for the Price Tier.
- If you fill in the Price information and press Save, that will automatically generate a ticket price
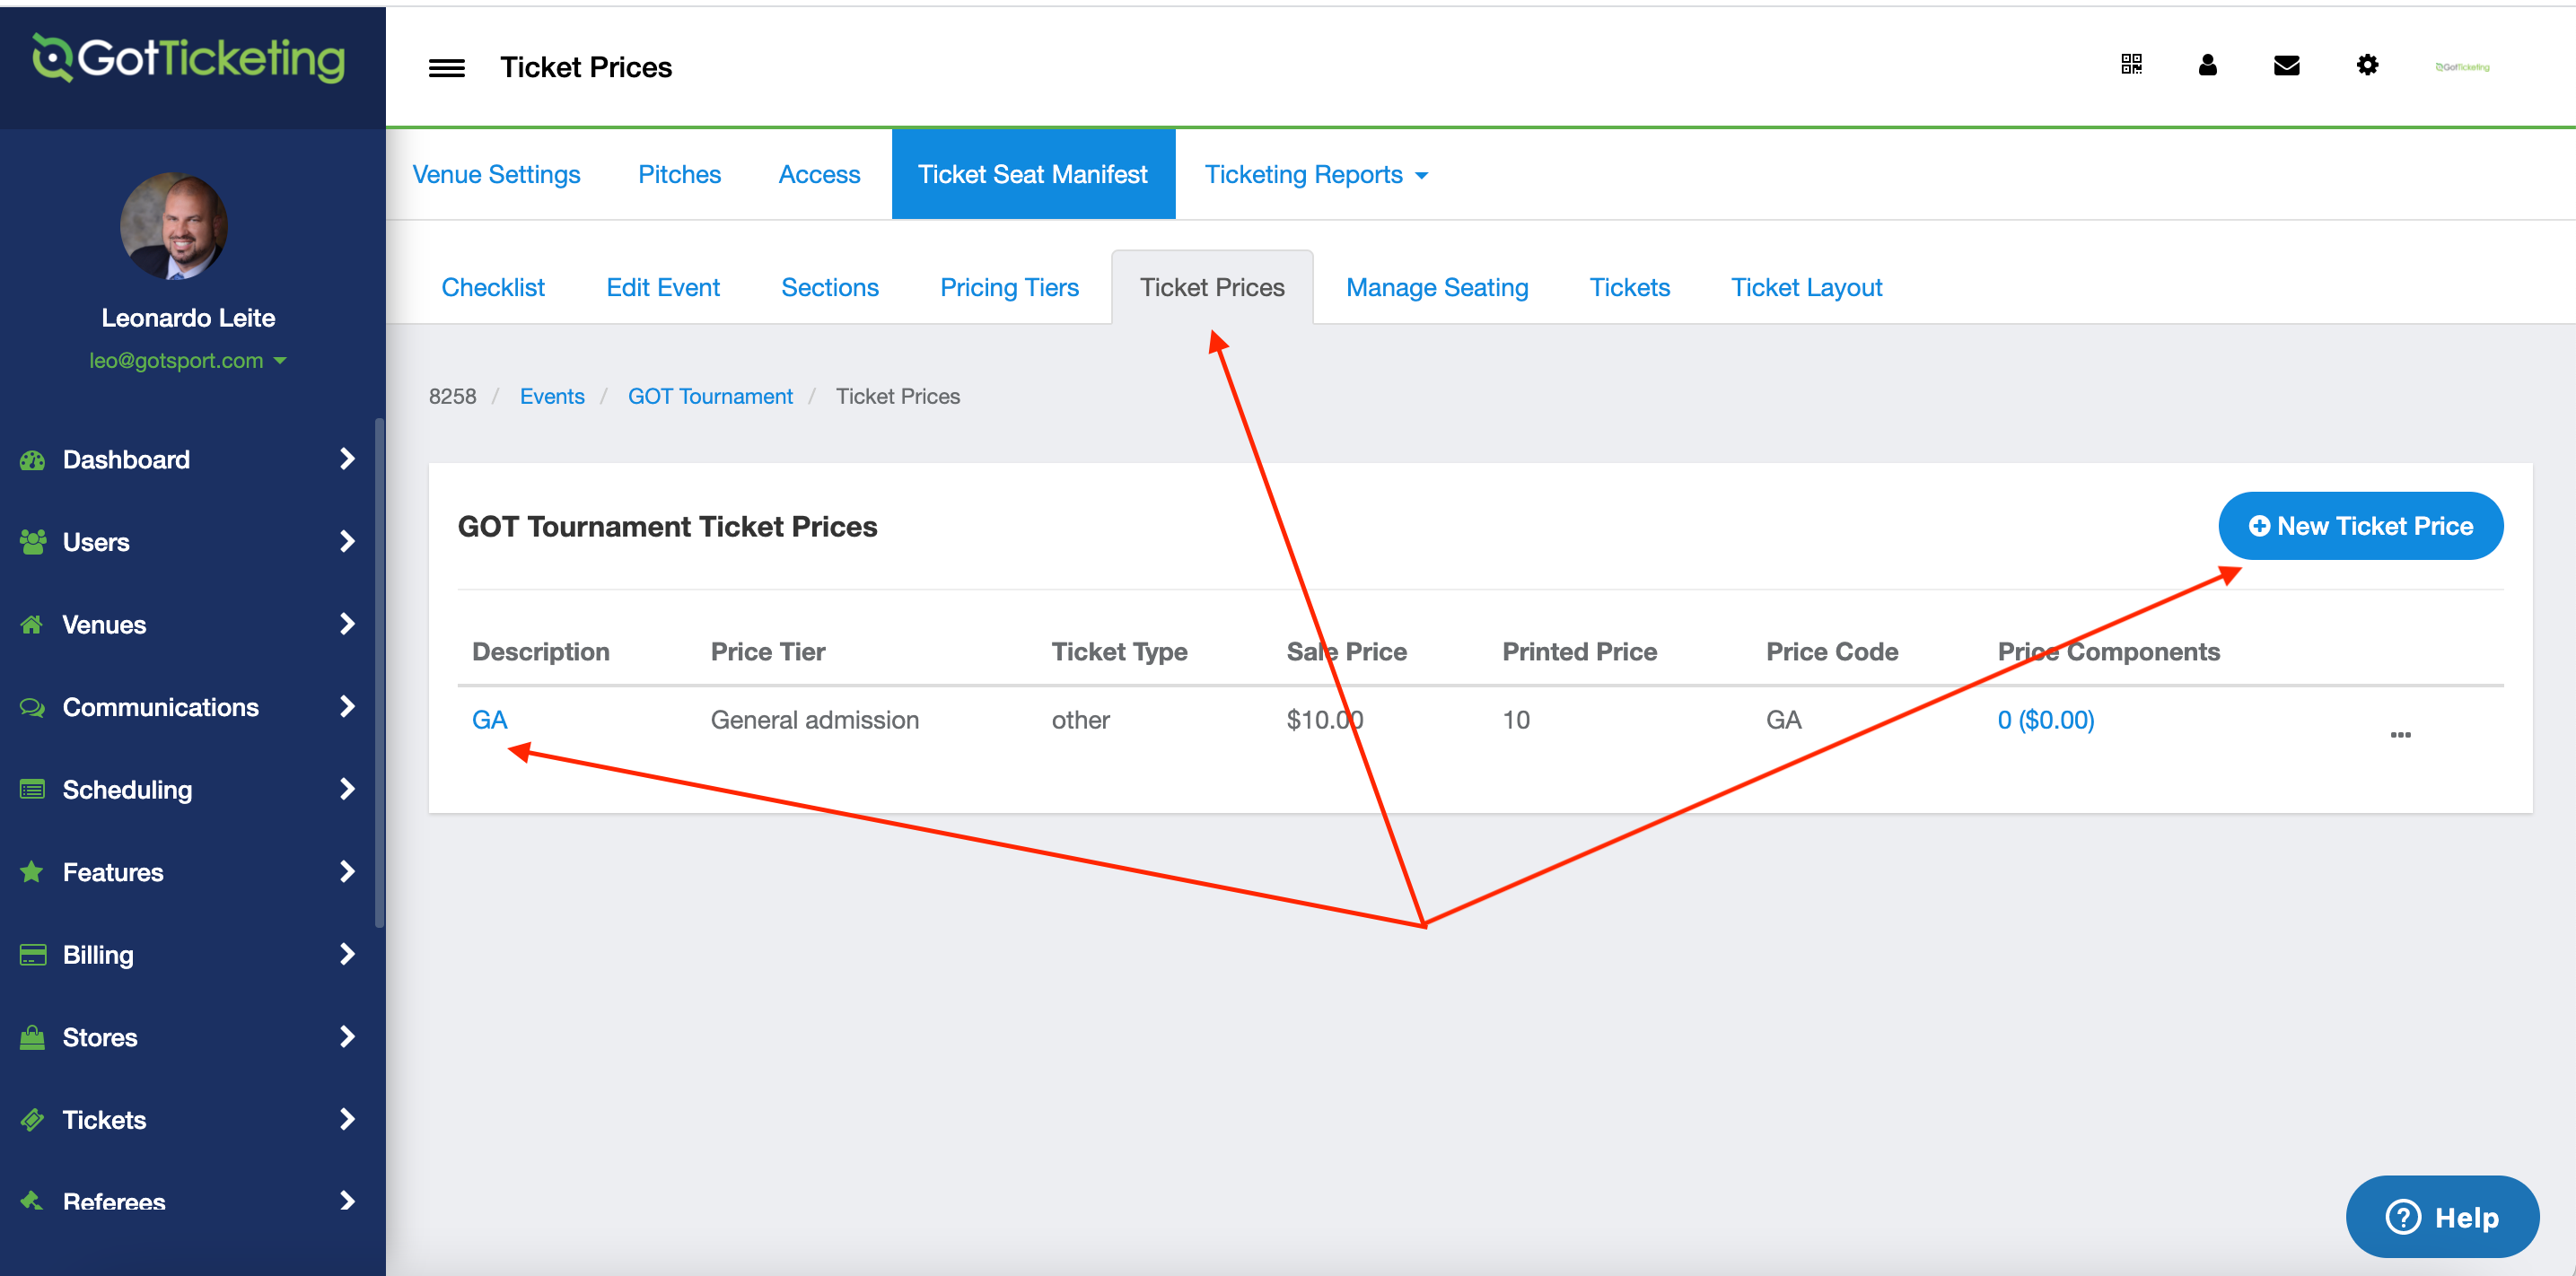
Step 10: Creating Ticket Price
- On the ticket price tab, you will have the option to create a new ticket price or edit the current ticket price.
Step 11:
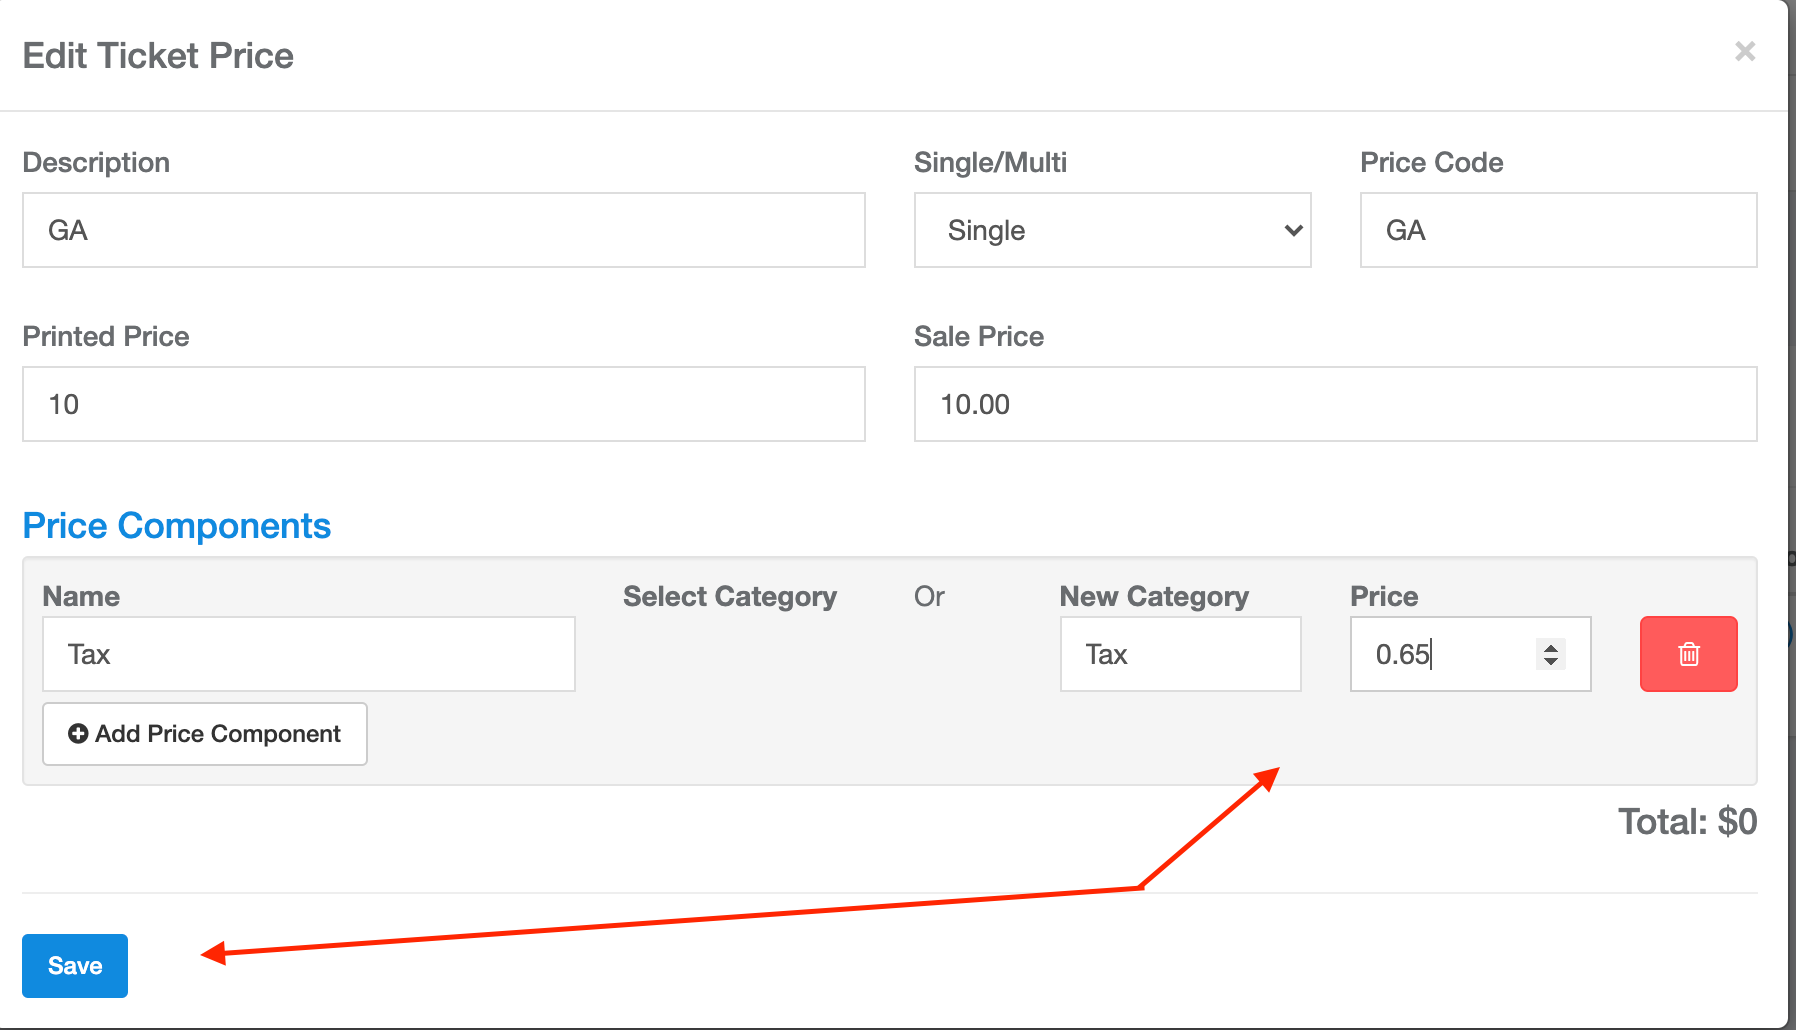
- If you click on the ticket price description, you will be able to edit your ticket and add price components.
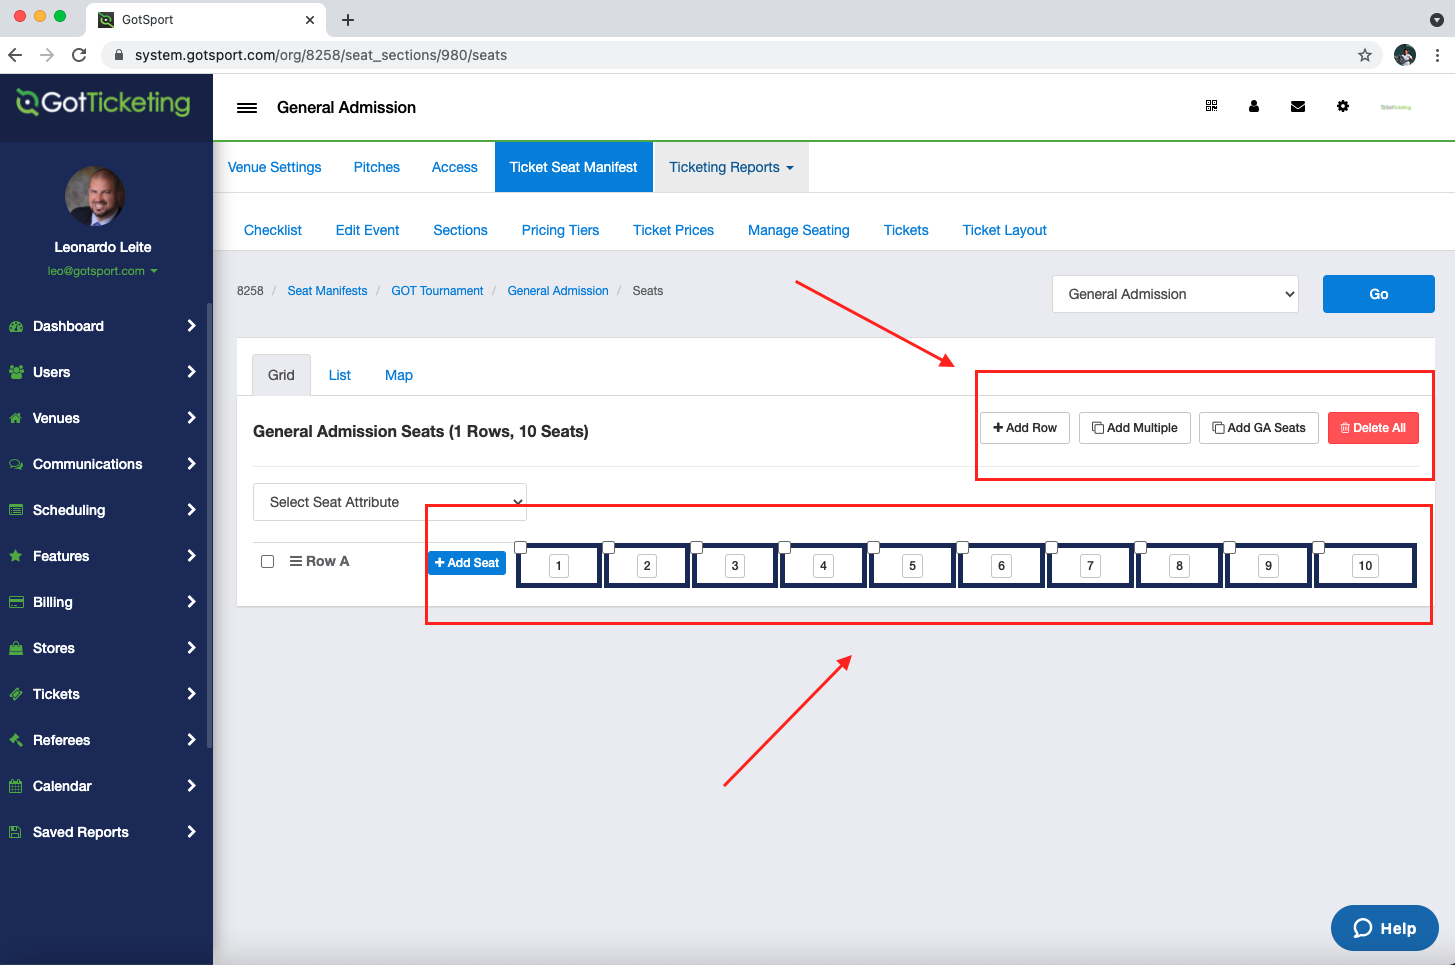
Step 12: Manage Seating
- Click on the Manage seating tab, then select the seating chart and press Go
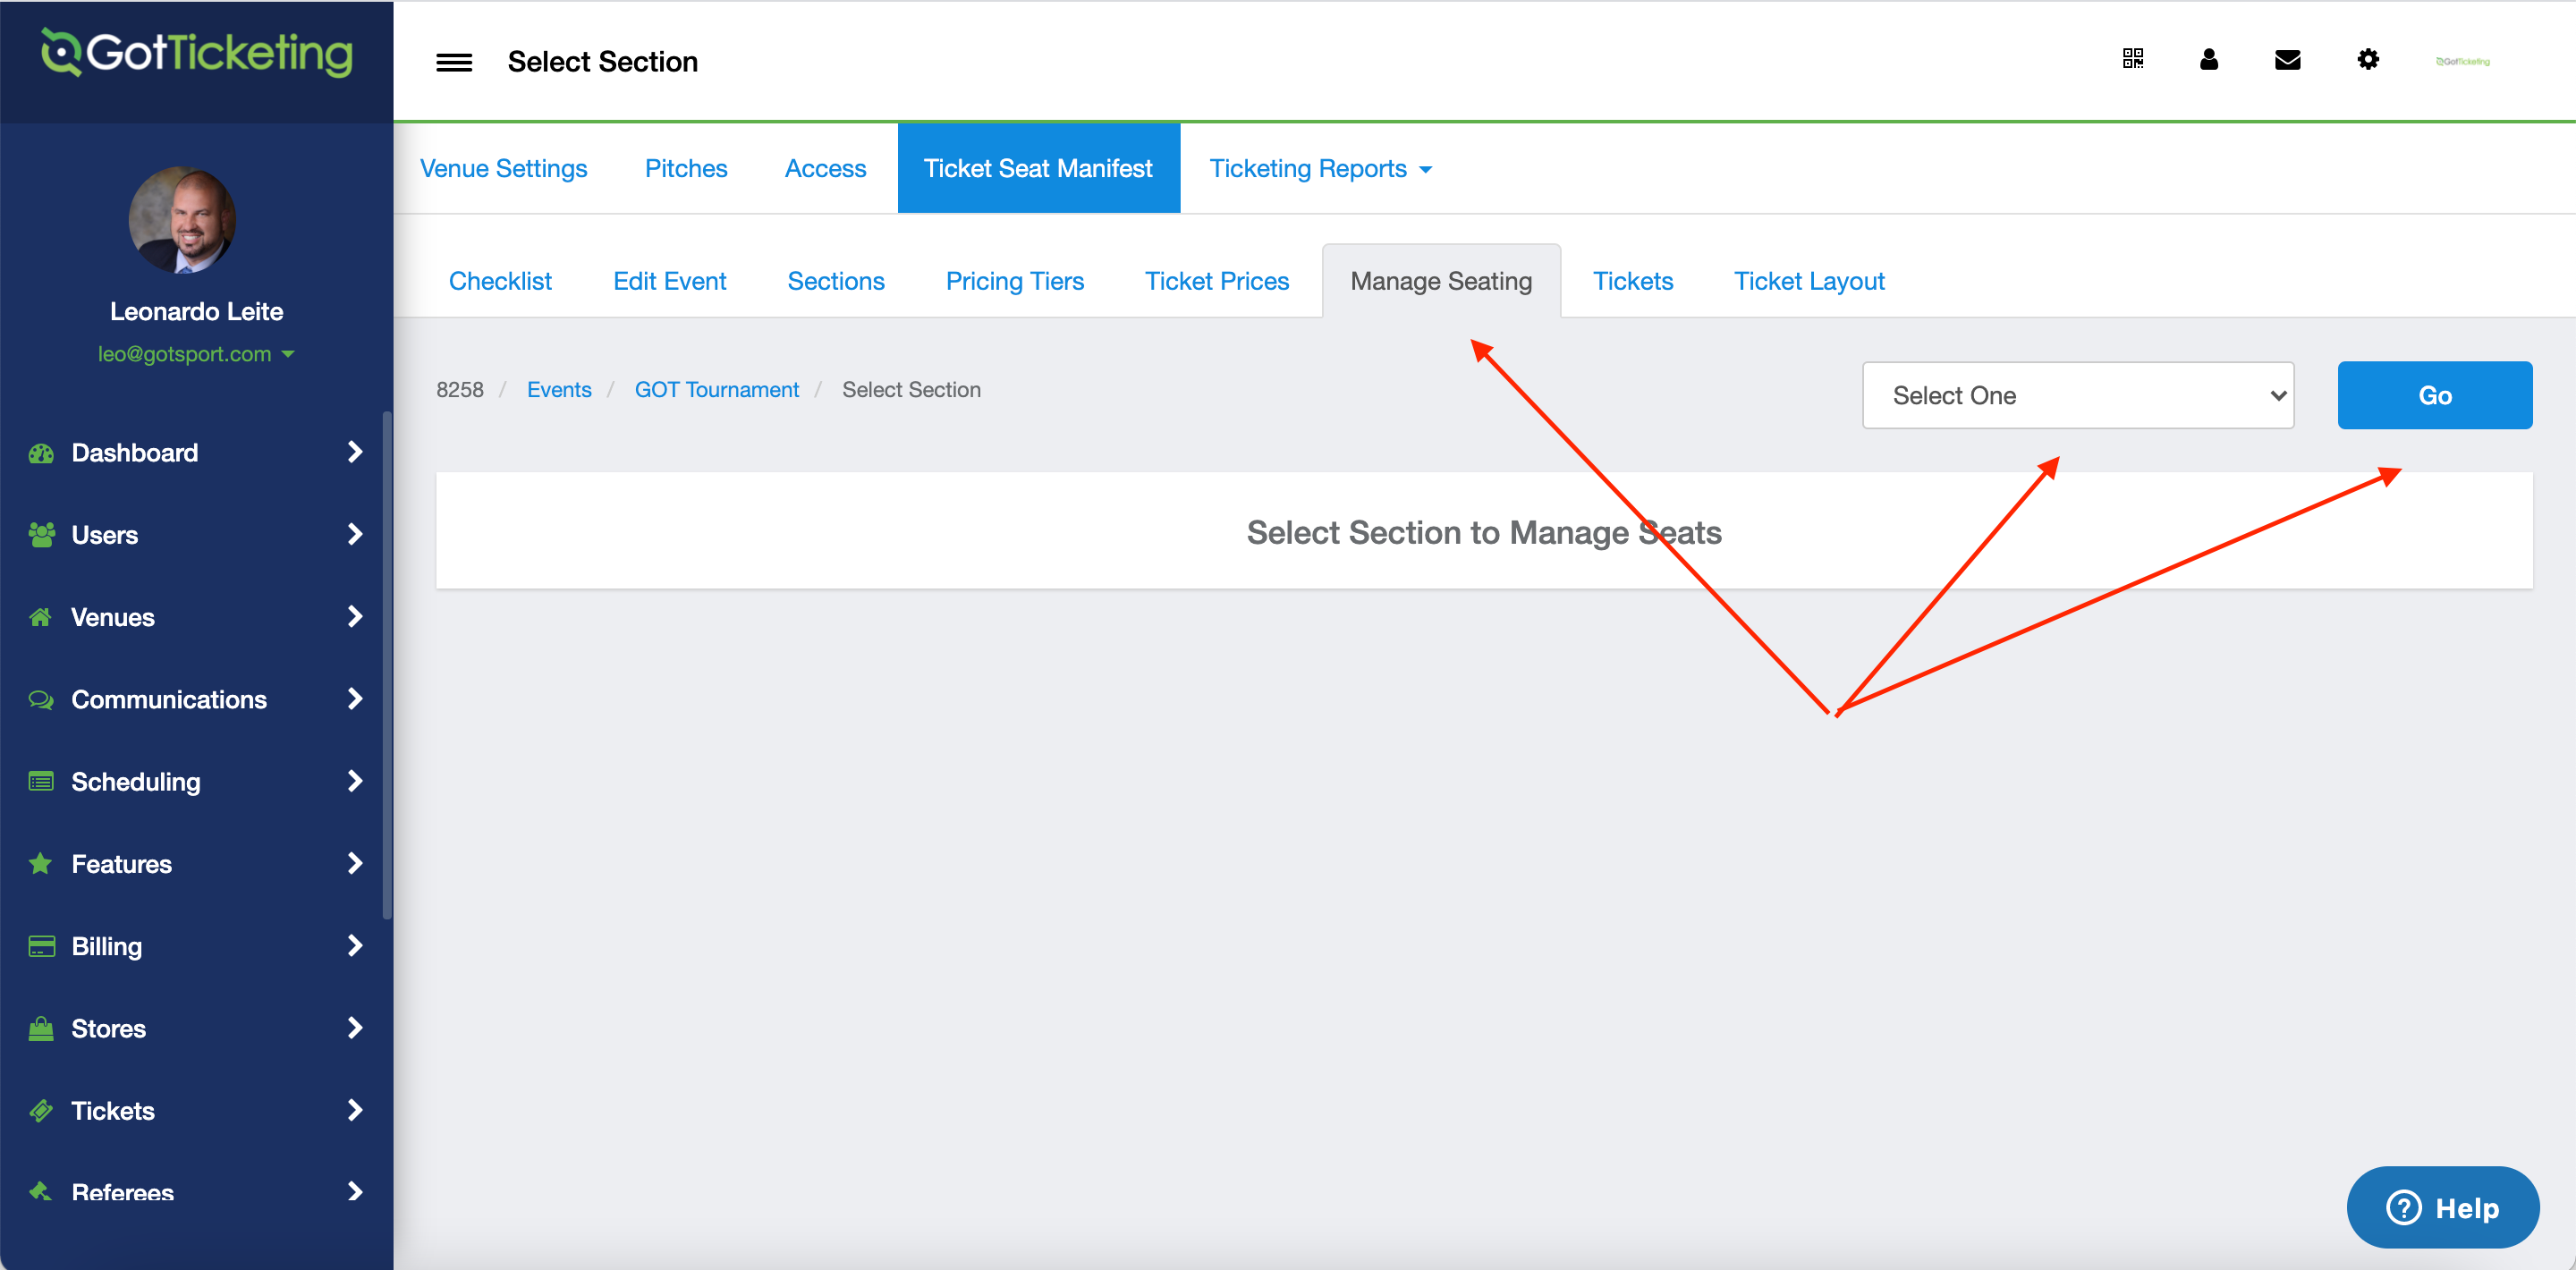
- This screen will display how many seats are already created (Step used when created sections) and allow you to manage your seating (add more, remove, and make changes).
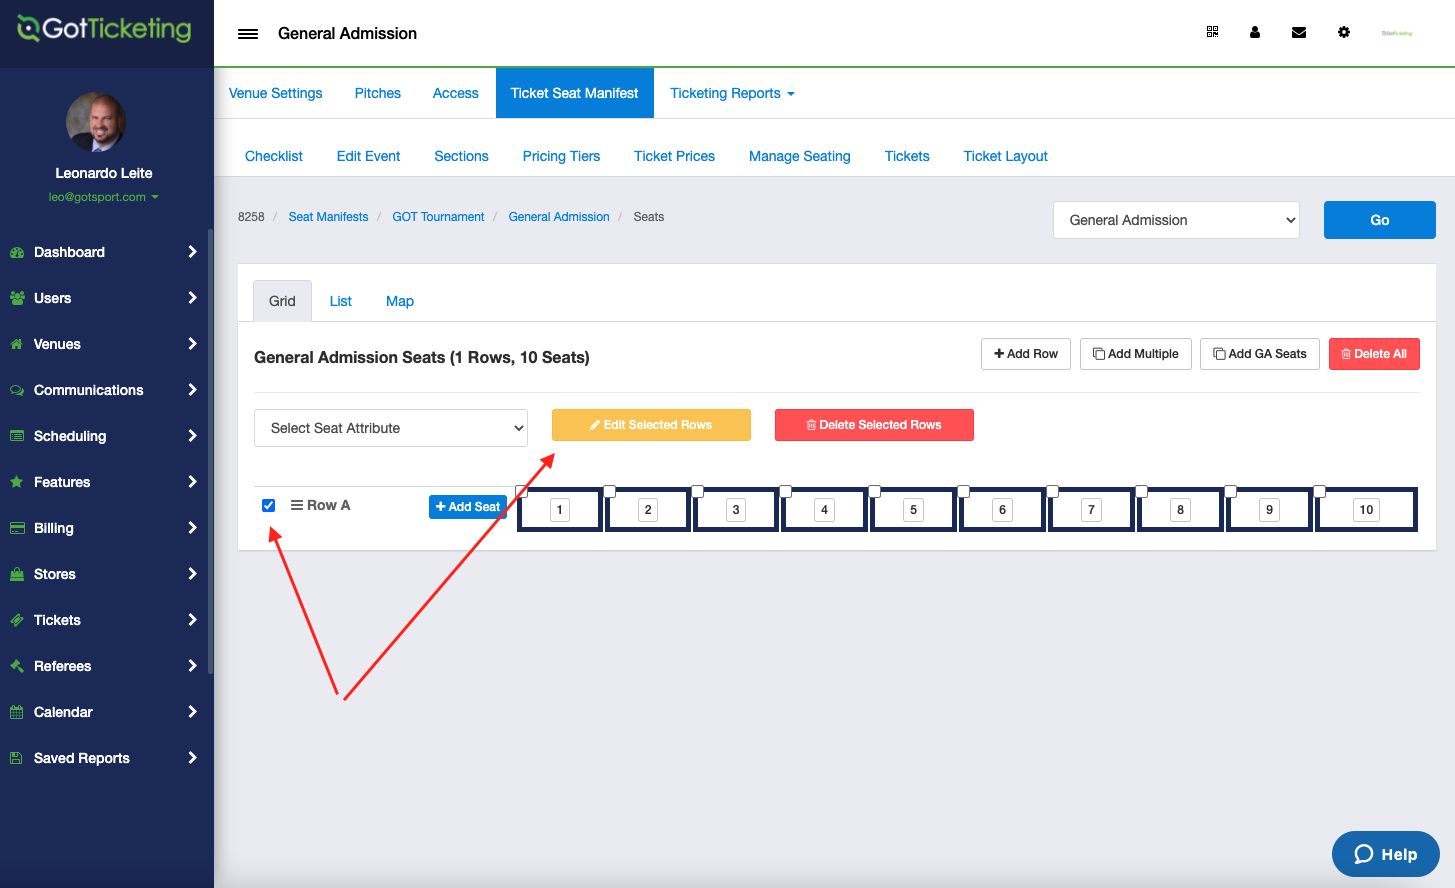
Step 13:
- Select the tickets and Click on " edit select Rowes" to associate the GA tickets with a price tier.
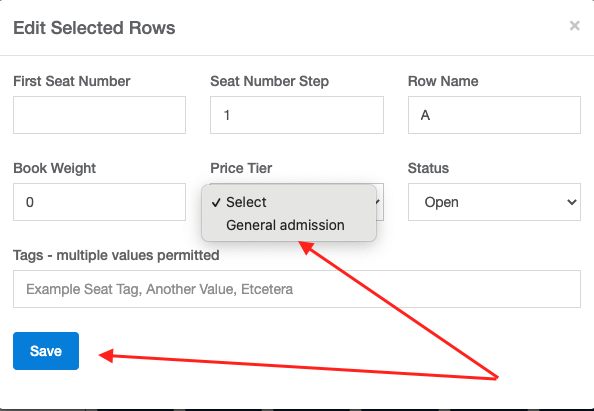
Step 14:
- Select the Price Tier to be associated with the Section or Type of GA ticket and press save
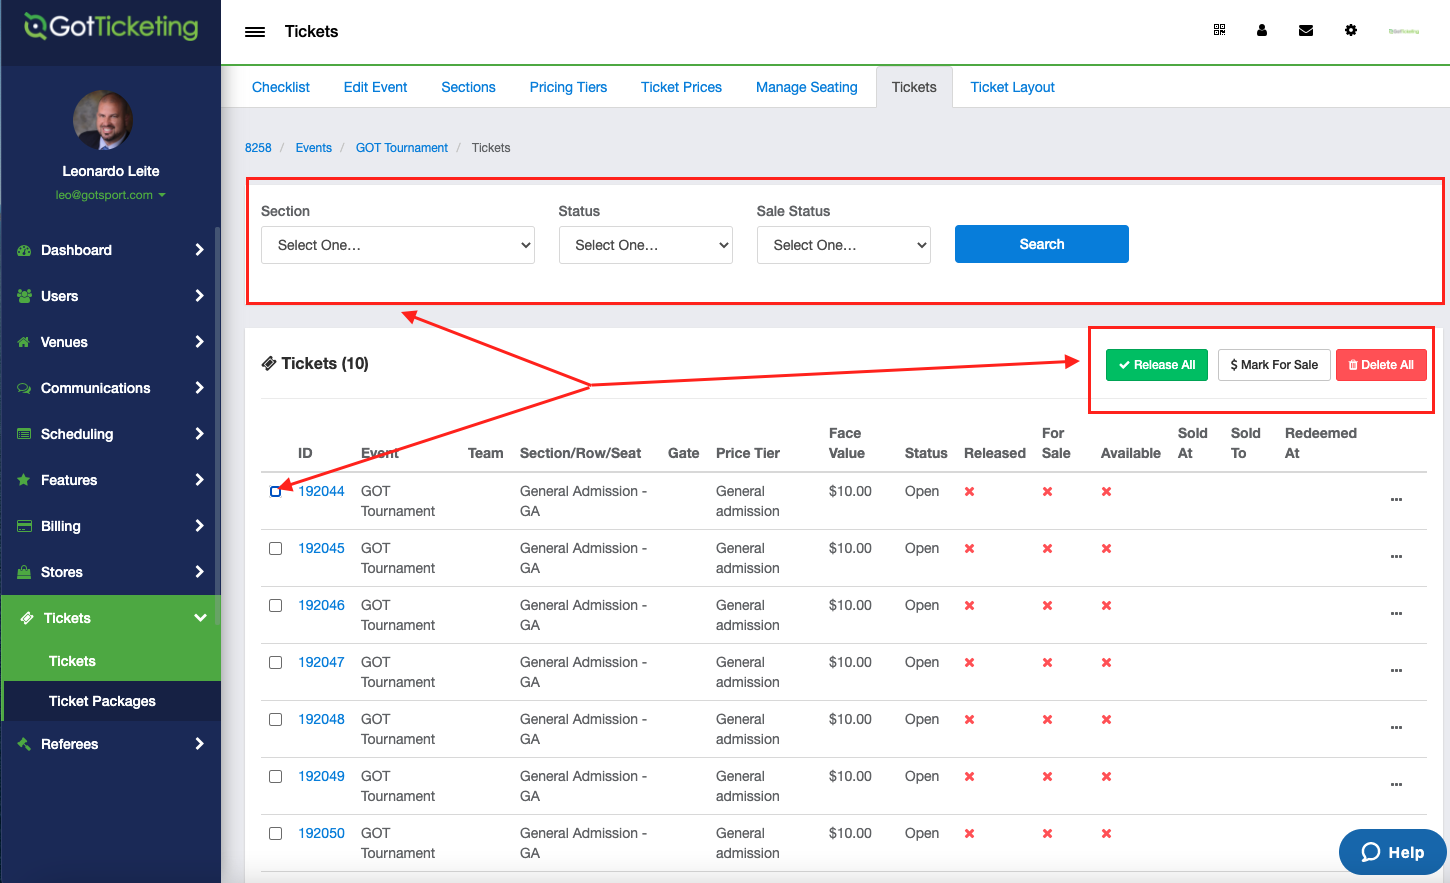
Step 15: Generate Tickets
- Click on the "Ticket" tab, then Click on "Generate tickets "
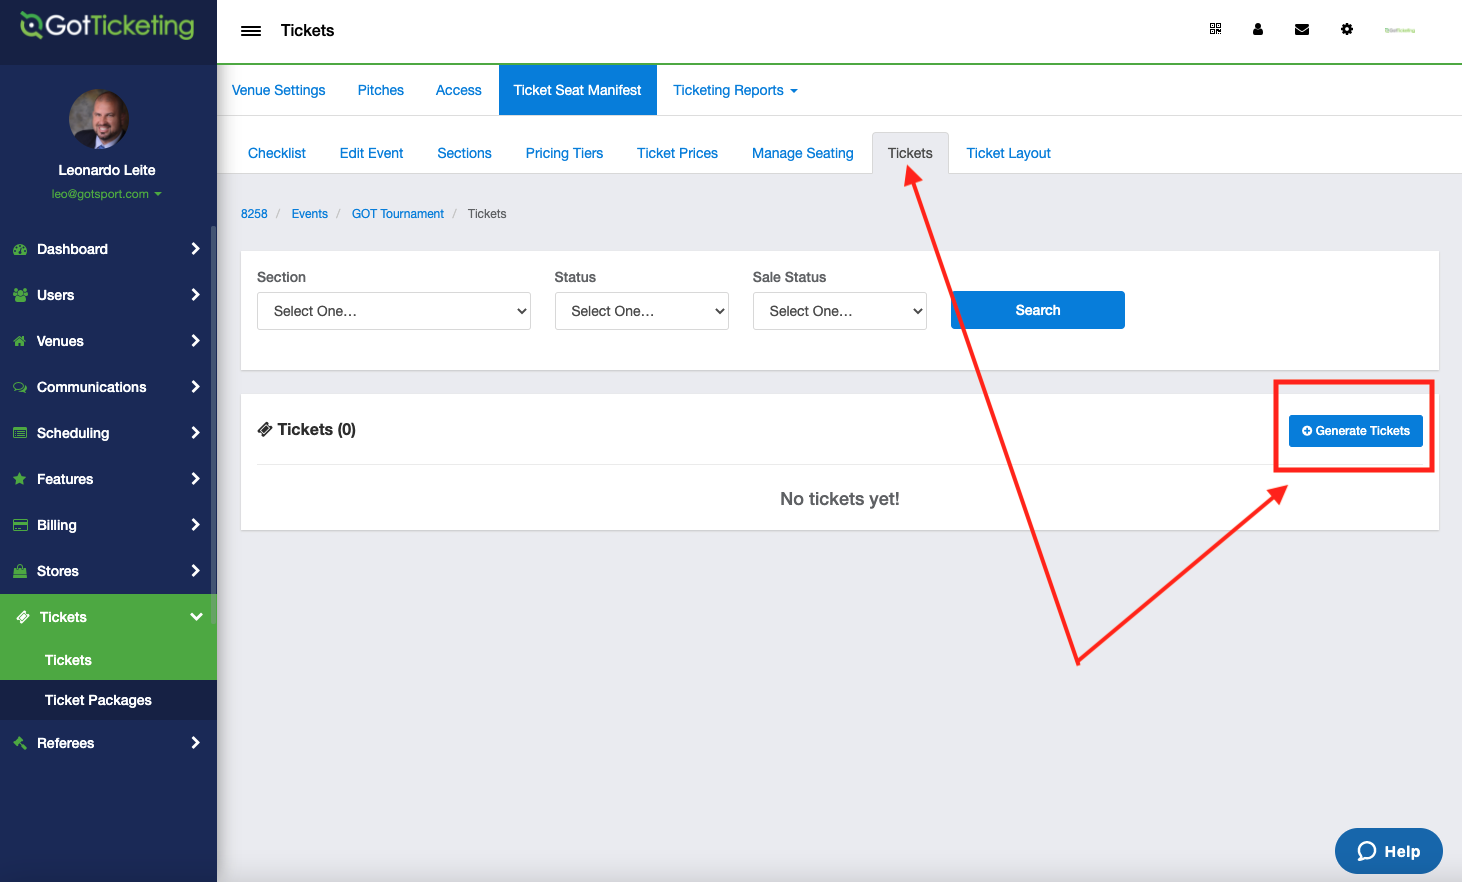
Step 16:
- Once the tickets are generated, you will be able to search, select and manage tickets.
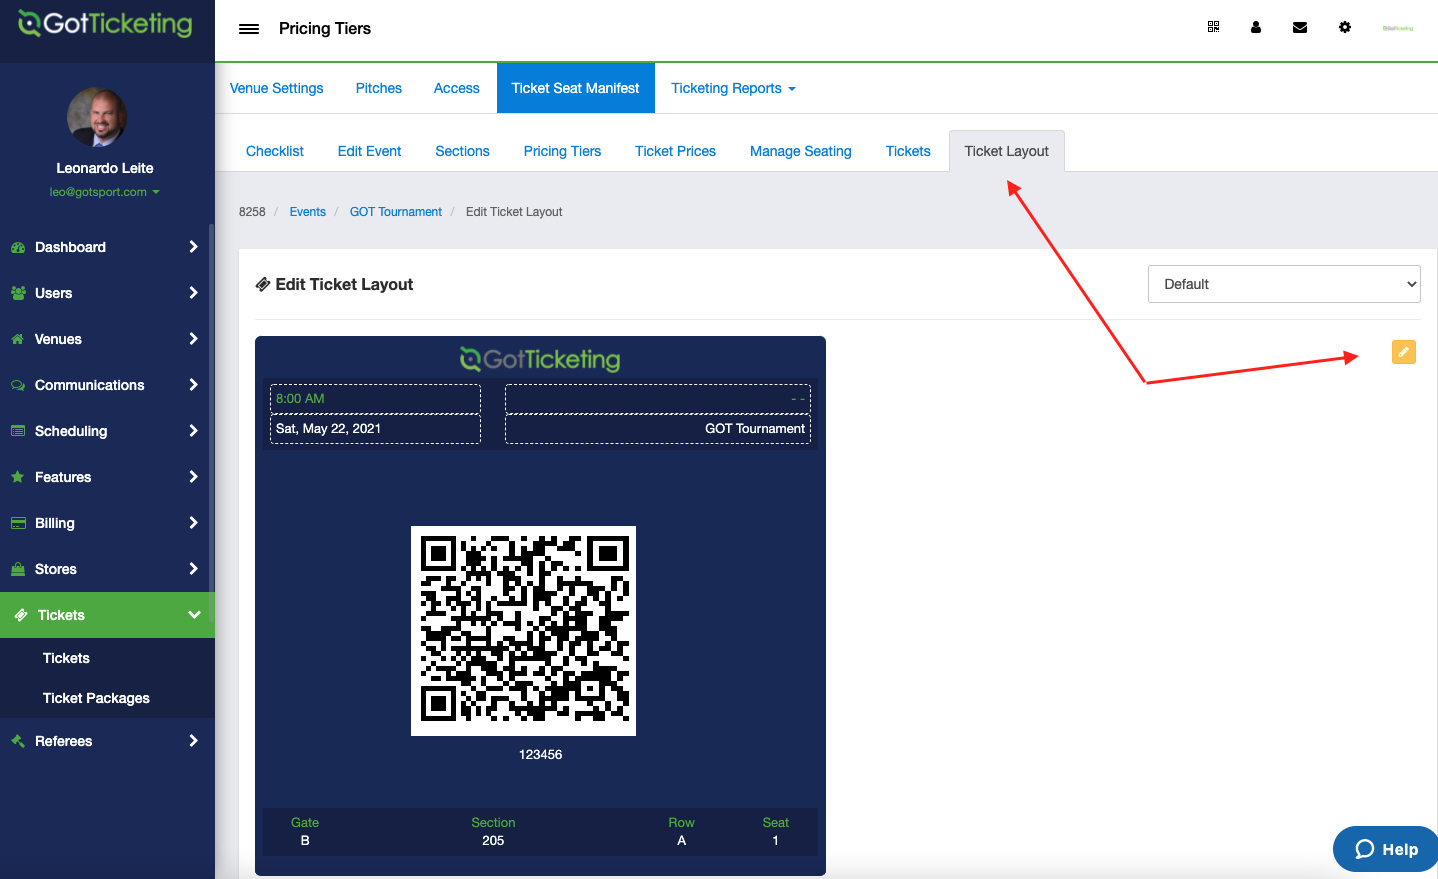
Step 17: Ticket Layout
- Click on the "Ticket layout " to add Ticket Instructions (Printed on Ticket) or change the ticket color. Be mindful that if you had chosen a ticket color at the price tier level that price tier level will automatically feed the correct ticket color and you can disregard this color option functionality.
- Tickets logos are defaulted to the event logo or the logo uploaded at the pricing tier level.
That will complete your ticket event process. The following steps will be