Instructions:
Step 1:
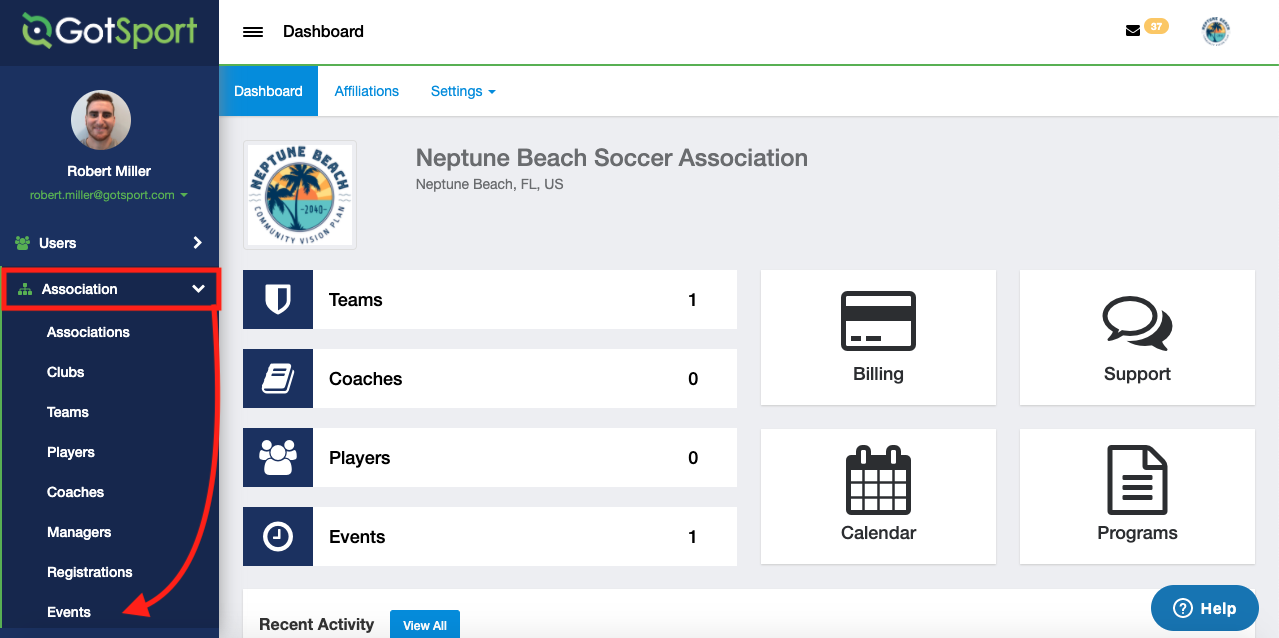
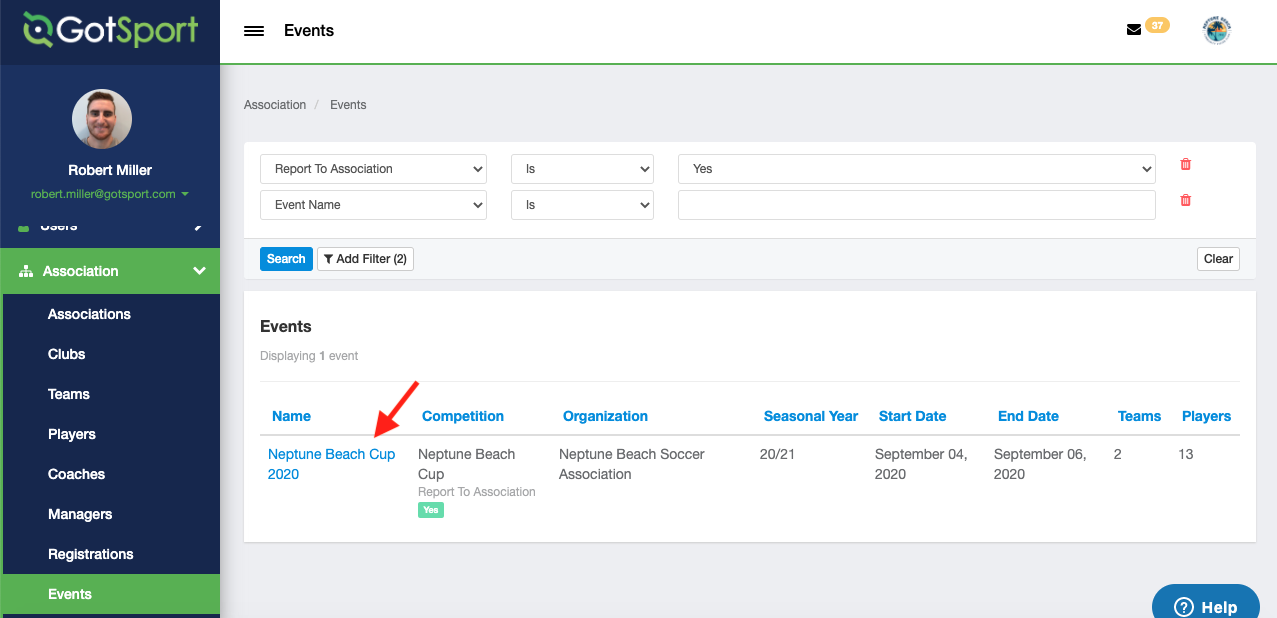
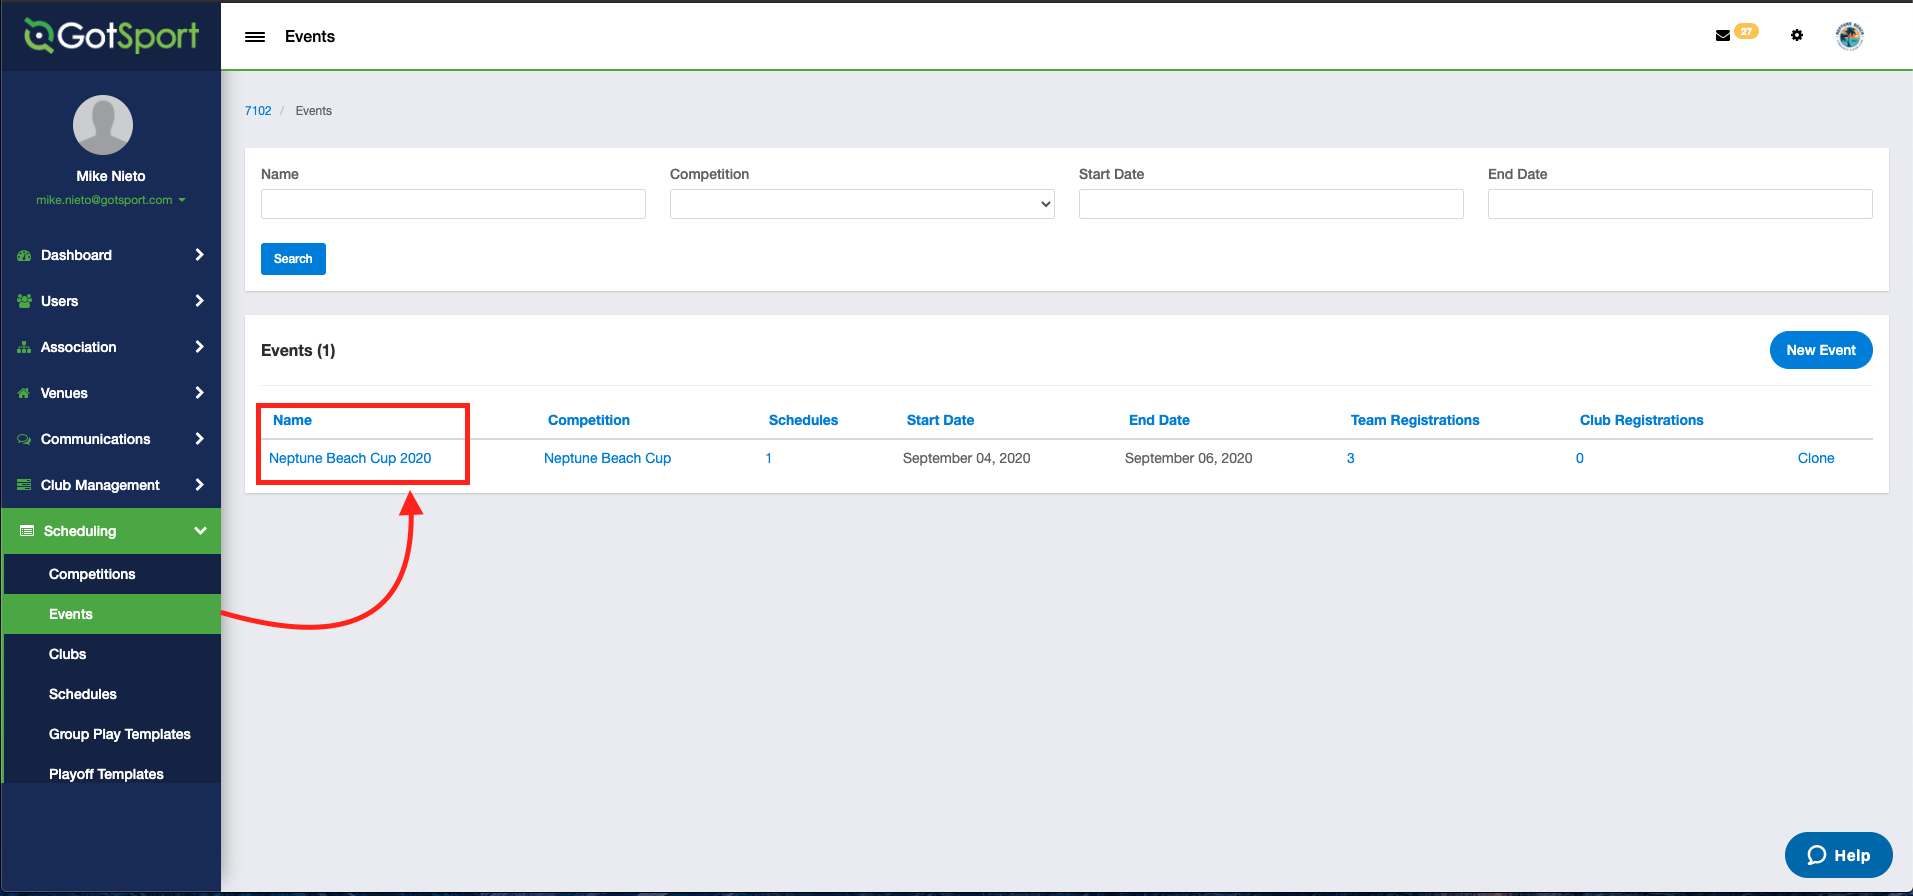
- Find the event and click on the name of the event you want to work within.
Step 2:
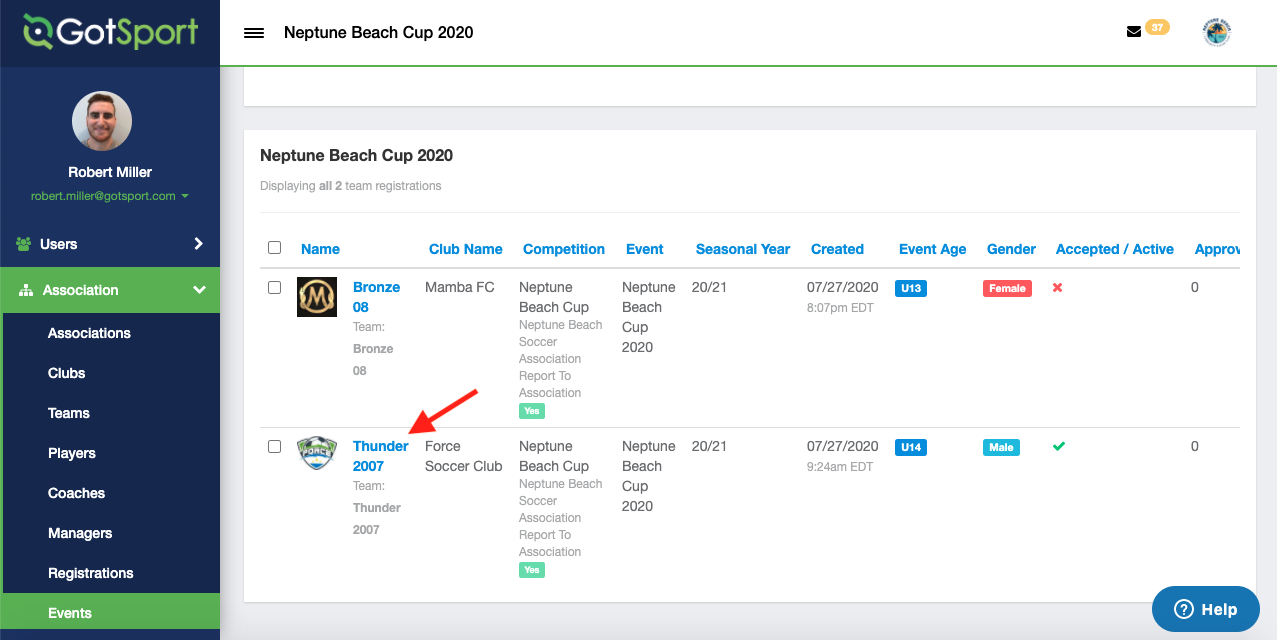
- Click "Registrations" and then into the name of the team you want to approve
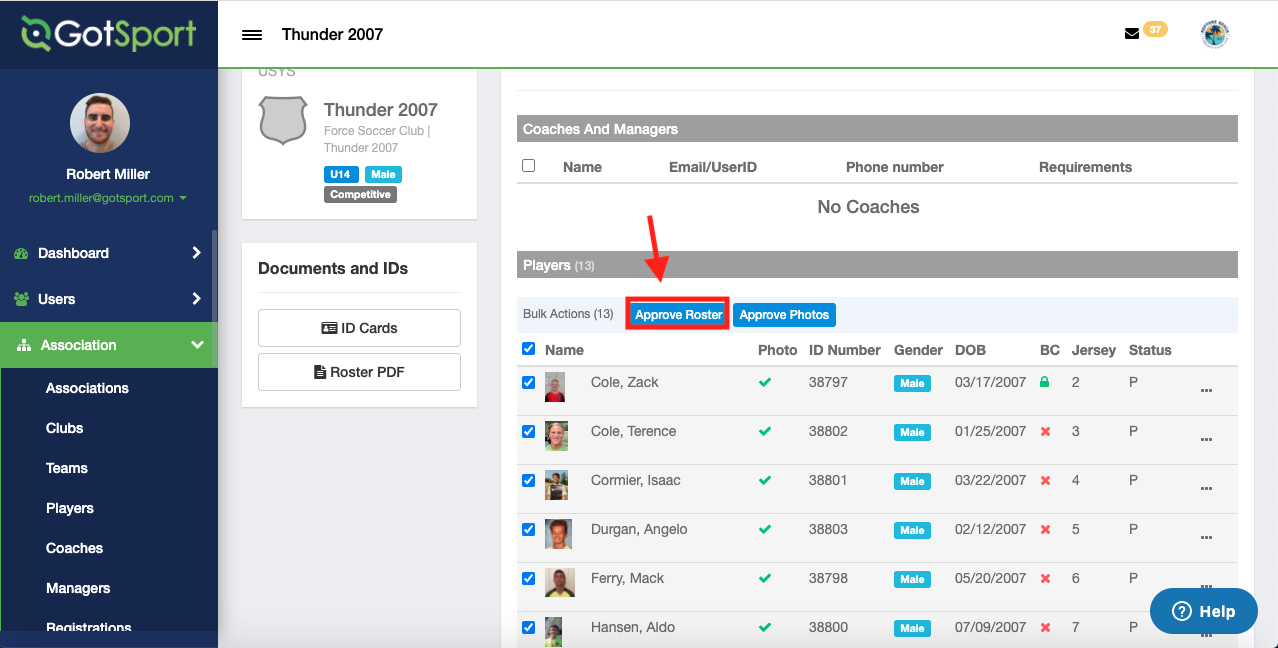
Step 3:
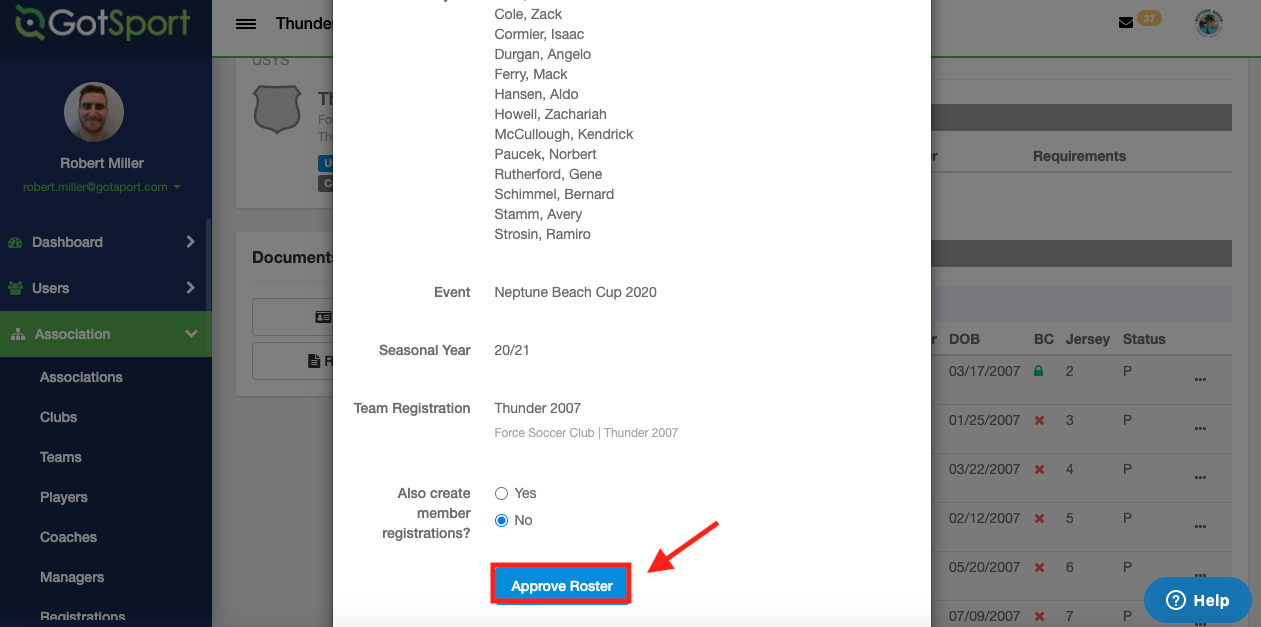
- Click the "Checkbox" next to each player, and click "Approve Roster". In the pop-up menu, click "Approve Roster" again to confirm.
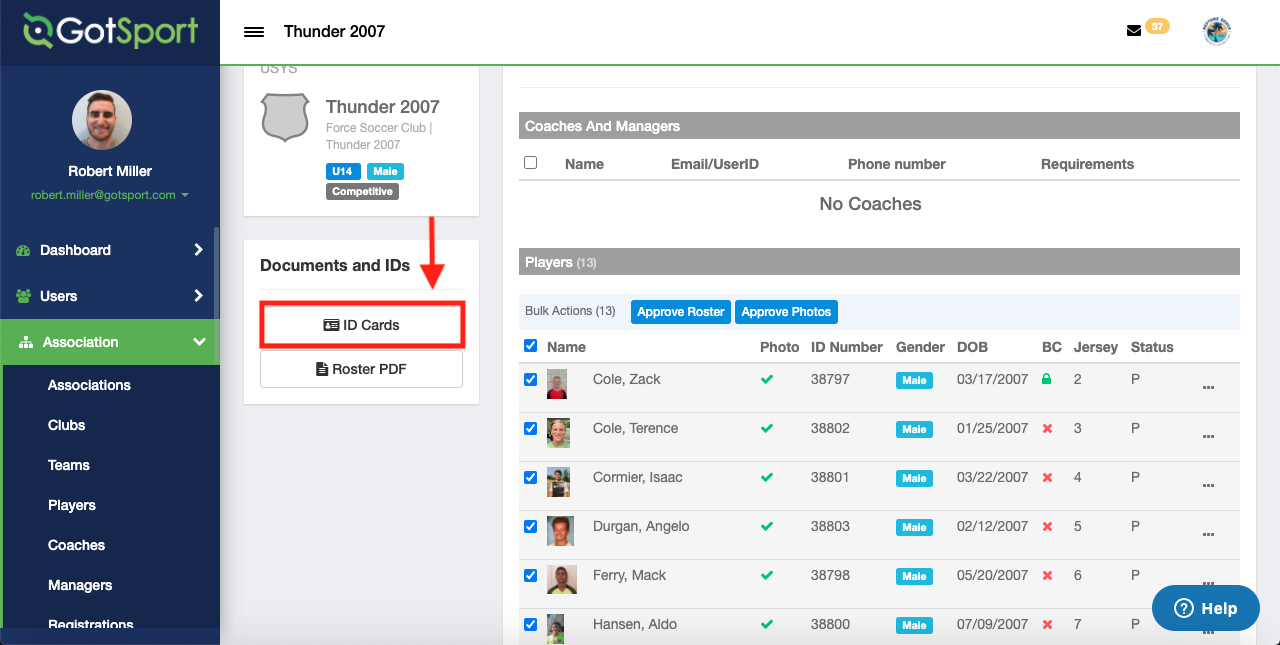
Step 4:
- Once approved, you can download the Roster PDF or ID Cards for the specific team under the Documents and IDs section
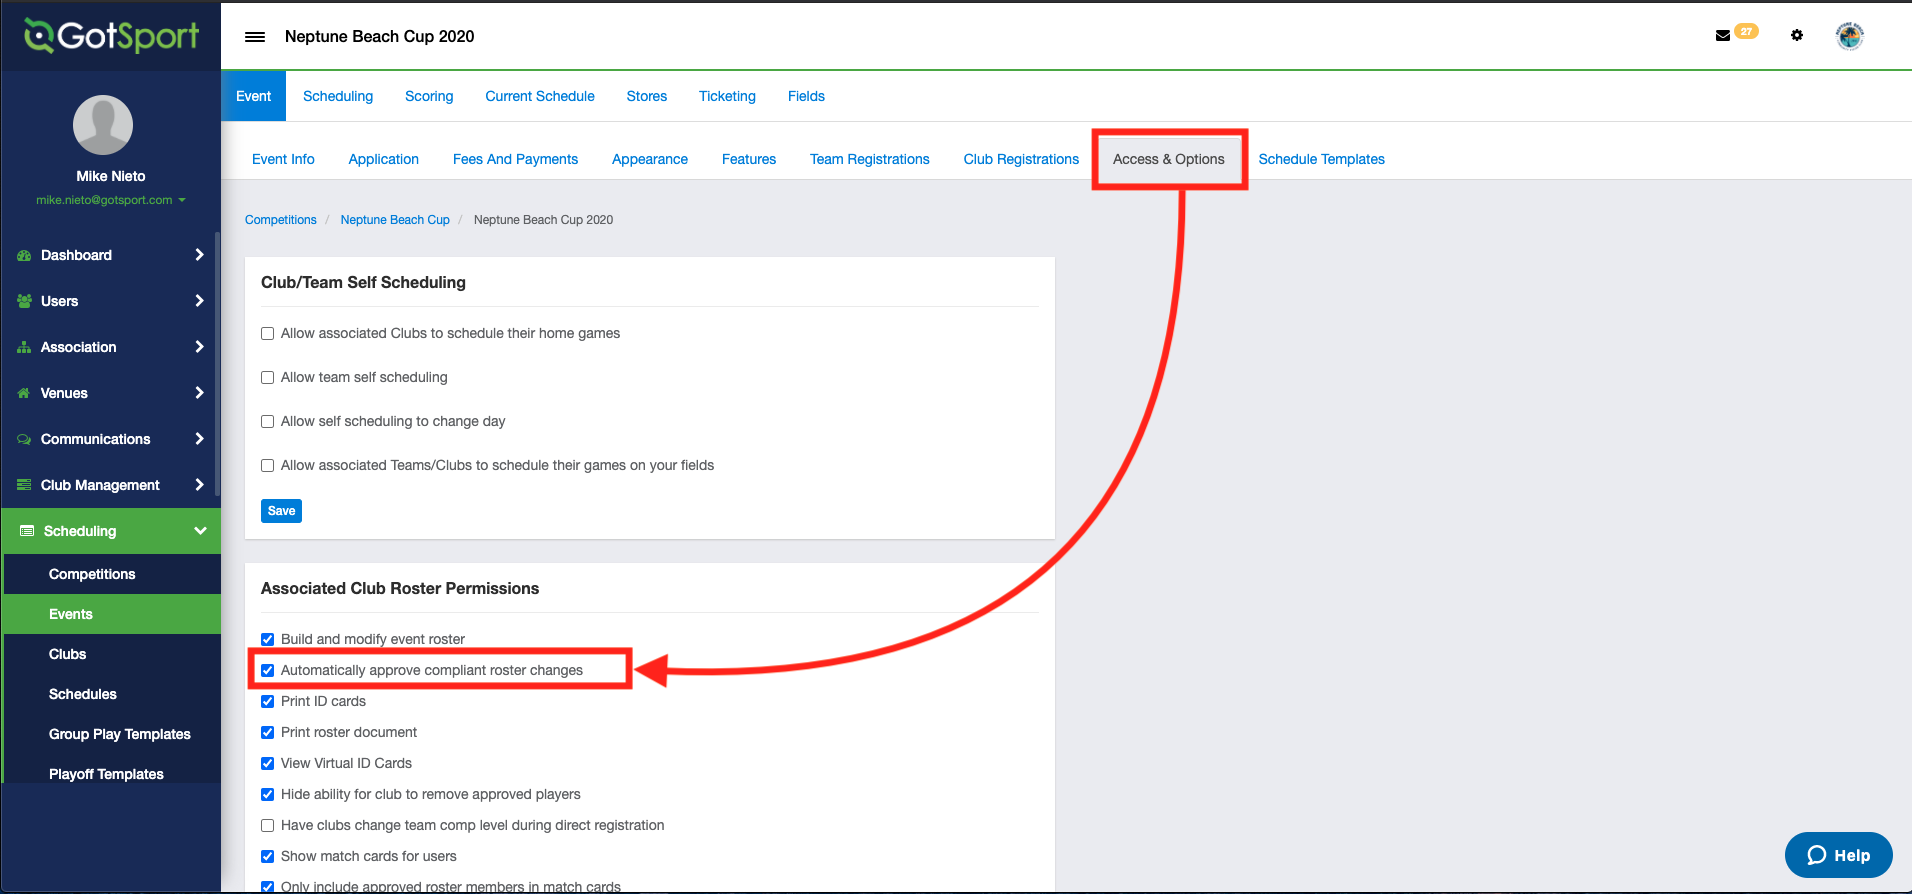
As a Governing Body you can give the option for your Clubs to approve their Event Rosters set against your Roster Rules. To do this, you will go to the Scheduling tab, Events, and click on the specific Event you want to enable this setting for.
- After going to the specific Event, you will go to the "Access & Options" tab at the top of the Event page and under the Associated Club Roster Permissions table enable "Automatically approve compliant roster changes". Be sure to scroll to the bottom of the page and click Save to enable your changes
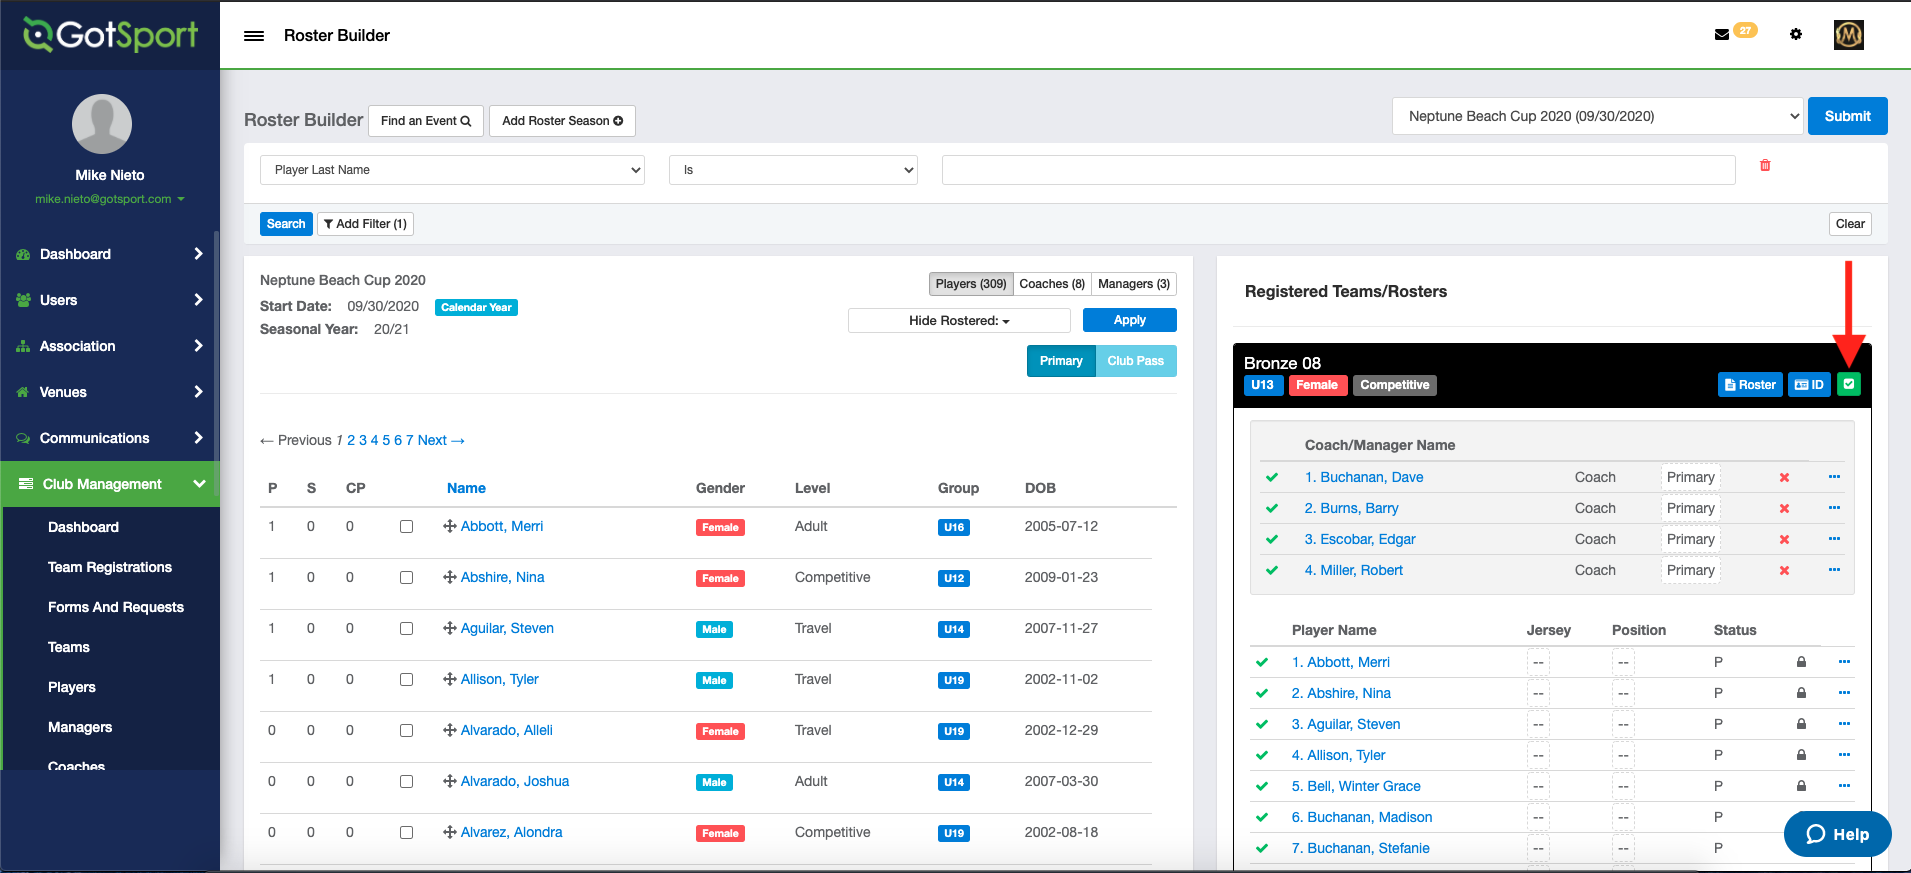
Once this has been enabled, your Clubs will be able to have their roster additions automatically approved. The Clubs will also be able to run a check against any previous additions that were already on their Event Roster before allowing the automatic approvals. Under their Roster Builder section for the specific Event, they will click the green checkmark noted below to have the check go through against your Roster Rules. Club Auto Approval Tool